Table of contents
TL;DR
Here’s how to create a progress bar in Notion:
- Create a new Notion database to store your project information.
- Set up two columns with ‘Number’ property types for current value and target value
- Add a new column to create the progress bar and set its property type to ‘Formula.’
- Enter the progress bar formula
- Change the number format of the formula column to ‘Percentage.’
- Select ‘Bar’ or ‘Ring’ to display the percentage as a visual progress bar.
- Customize the color of the progress bar.
A progress bar in Notion is a visual tool that illustrates the degree of completion of a task within a Notion database. You can set it up as a colored line or a circle, filled proportionally to represent the advancement made on a specific task.

For instance, if a task is 40% complete, the progress bar would be colored 40% of its length from the left, leaving the remaining 60% in a neutral or gray color. This provides a quick insight into the completion status of a task, allowing project managers to monitor progress easily.
Here’s a snapshot of what a progress bar looks like:

Built your Notion progress bar? Put it on a fast, beautiful website with Super. Publish in minutes, keep your database live, and share progress with anyone.
Create your website with Super today
Let’s get into details.
1. Set up a new database
Databases are essential for managing projects in Notion. They act as the central-hub for all relevant information and make collaboration easy. But why do we need Notion databases to create progress bars? That’s because they enable you to assign properties to the columns. A column property defines why type of text is allowed for all entries under it.
For example, the below image illustrates a Notion database card for an employee. It displays many different property types.

The field labeled "Compensation" utilizes the 'number' property type to indicate the employee's pay. The "Date of Joining" field employs the 'date' type to specify when the employee started their tenure. And the "Reporting Manager" field uses the 'person' type to identify who the employee reports to in the organizational hierarchy.
And here’s what the complete database looks like:
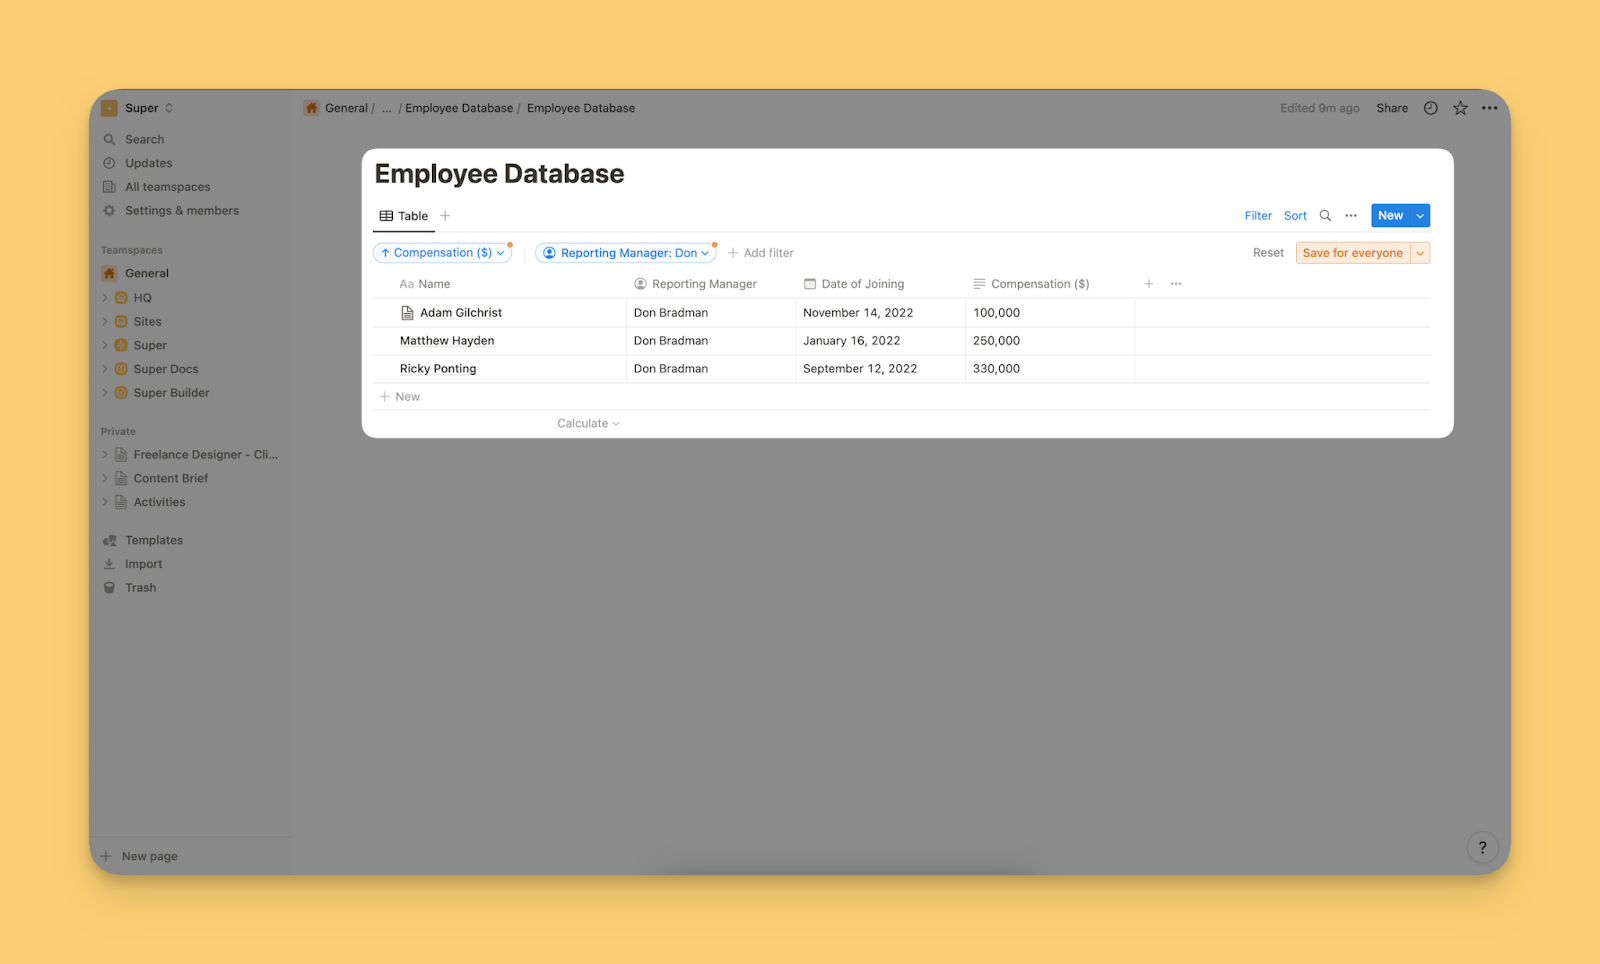
Each column within a Notion database has a specific data type assigned to it, and all data inputted into these columns must adhere to their respective types. For example, you can't place a 'Person' type entry into a 'Number' type column. This distinction is necessary, particularly because progress bars can only be applied to 'number' and 'date' property types.
More on how to do that later. For now, just create a new Notion page and set up a database in it. We will use the following database as a reference throughout the article.

This database monitors the revenue figures for an organization. In this example, the revenue is $100,000 in January, while the end of the year target is $1,000,000. We will set up a progress bar for visual representation of this ratio.
2. Edit column properties
As previously discussed, we're going to demonstrate how to generate a progress bar using a 'number' property type. To assign the correct property type to a column, start by clicking on the column title, followed by the "Edit Property" option. This action will present a new dropdown menu—within this menu, select "Type."

Finally, click on “Number” as shown in the below image.

Follow the above steps to set the “Property” of “Current Revenue” and “Target Revenue” to “Number”. Notion will recognize that the entries under these two columns must exclusively be numerical values, rather than text or dates — this specification is required to create the progress bar formula.
3. Construct the formula for the progress bar
Create a new column to the right of “Target Revenue” — here’s where we will create the progress bar.
First, go to the “Property Type” view, the same way you did for the “Number” view in the previous step, and change it to “Formula.”
Next, click on the “Edit” option as shown in the below image to open the window where you can type in the formula.

Click on “Current Revenue” to insert it into the formula, then type “/” (which signifies division), and finally, click on “Target Revenue”.
As displayed in the below image, we have essentially set up division of the numbers under the “Current Revenue” and “Target Revenue” columns.

Upon clicking "Done," you'll observe that Notion has generated a decimal value from our formula. In the subsequent step, we will convert this decimal result into a visual representation—creating our progress bar.
4. Set up the Progress Bar
To turn the decimal value into a Progress Bar, first navigate to the “Edit Property” view, click on “Number Format” and then choose “Percentage.” This action will instantly turn the decimal value into a percentage as shown in the below image.

As the last step, select “Bar” to turn the percentage value into a progress bar, as shown in the below image.

Alternatively, you can opt for “Ring” to get a different visual representation. And that’s it! Your progress bar is all set up.
Here’s what the progress bar represents — it’s easy to tell for a business owner that 10% of the net target revenue was achieved in January.
For a final touch, you can fine-tune the appearance of the progress bar to suit your page aesthetics. While the default color is green, you can select any color from the range of hues that Notion offers.
Notion built for managing projects and provides many features that support project managers. Progress bars are only one of the many tools. You can create a variety of database views like the Notion Gallery view, Kanban view, Timeline view, etc. Your requirements can range from managing a remote team to creating a Notion website, you can use Notion for anything!
How to create a progress bar from a checkbox in Notion?
You can easily create a progress bar from a checkbox framework by using the right Notion formula.
Suppose, this is the database that captures the progress:
Day | Push-Ups | Sit Ups | Squats | Cardio | Yoga | Formula |
|---|---|---|---|---|---|---|
Monday | ||||||
Tuesday | ||||||
Wednesday | ||||||
Thursday | ||||||
Friday | ||||||
Saturday | ||||||
Sunday |
You can add a progress bar by first adding a new column with the “formula” property. Next, use this code to add the progress bar:
sum( if(empty(prop("Push-Ups")), 0, 1), if(empty(prop("Sit Ups")), 0, 1), if(empty(prop("Squats")), 0, 1), if(empty(prop("Cardio")), 0, 1), if(empty(prop("Yoga")), 0, 1) ) / 5
This formula checks for the columns that are checked and considers them alone while calculating the percentage of tasks completed during the day. It assigns the value “1” to checked items and “0” to the unchecked ones. Next, it adds all “1”s and divides the sum by 5 to get the average.
Choose the type of progress bar you want to employ by editing the settings of the “formula” property - It could be a bar or ring progress bar.
Keep your progress bar in Notion and put the website work on Super. Publish, brand, and share in a few clicks.
Frequently asked questions
Can you make a progress bar in Notion?
While Notion does not offer an easy to use widget or block to set up progress bars, there is a workaround — you can use the Notion progress bars formula in conjunction with different number data types that Notion offers to create a visually appealing progress bar.
How do you change the color of the progress bar in Notion?
Access the “Property view” of the progress bar and click on the drop-down next to the “color” option. Next, select any color from the palette offered by Notion.

Get Super’s bi-weekly Notion Newsletter
