
Organizing and retrieving data are essential functions of every business. They determine how quickly teams can access data, how effectively they can analyze it to gain insights, and how accurately they can use it to make informed decisions.
Whether you are a solopreneur or a full-fledged enterprise, your data management strategy impacts your growth rate.
Notion databases are useful in this regard as they provide exceptional flexibility for storing, editing, sharing, and analyzing data. All of these functions can be performed in just a few clicks.
Additionally, Notion enables you to share databases with specific users, ensuring data security.
Moreover, you can move Notion databases to any page you choose, like other Notion blocks. You can use them for a wide range of tasks, such as managing Notion websites, HR activities, company finances, etc.
In this blog post, we will guide you through the process of creating Notion databases and using all the capabilities that Notion offers.
Here’s how to create a database in Notion:
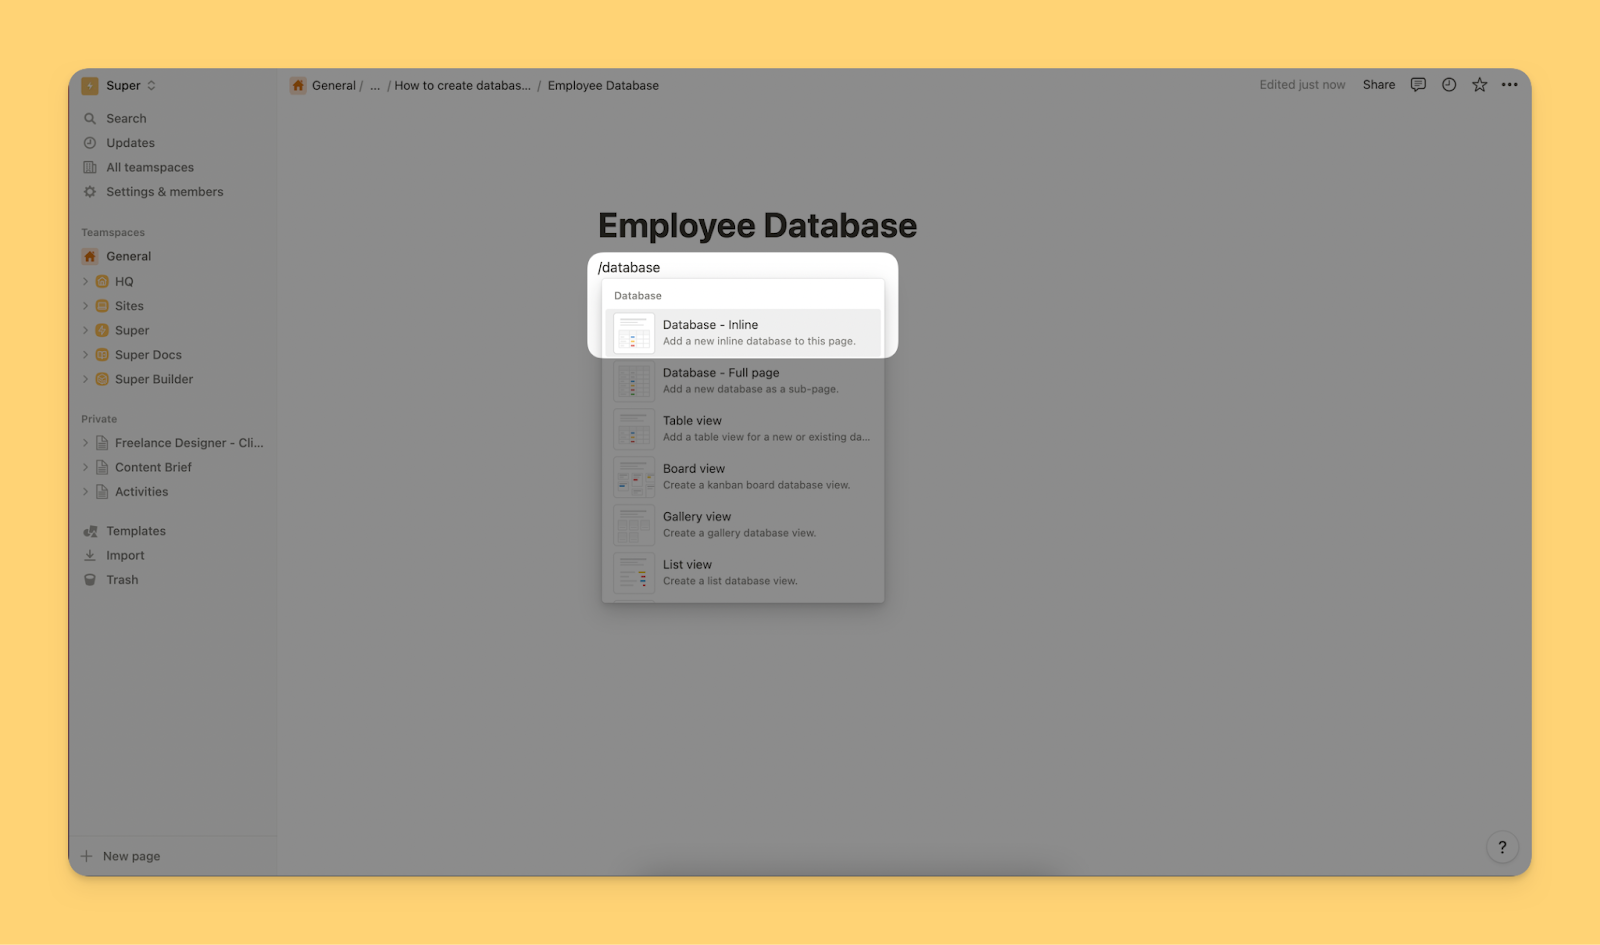
1. Create a database block
Go to the page where you want to add the database and type /database to open the blocks menu. Click on Database - Inline if you want to create the database on the same page. Or if you want to create it as a new page, click on Database - Full page.
Notion also offers a range of different views for databases such as Table view, Board view, Gallery view, and List view. We will cover all of them in later sections.
Here’s what the empty database looks like.
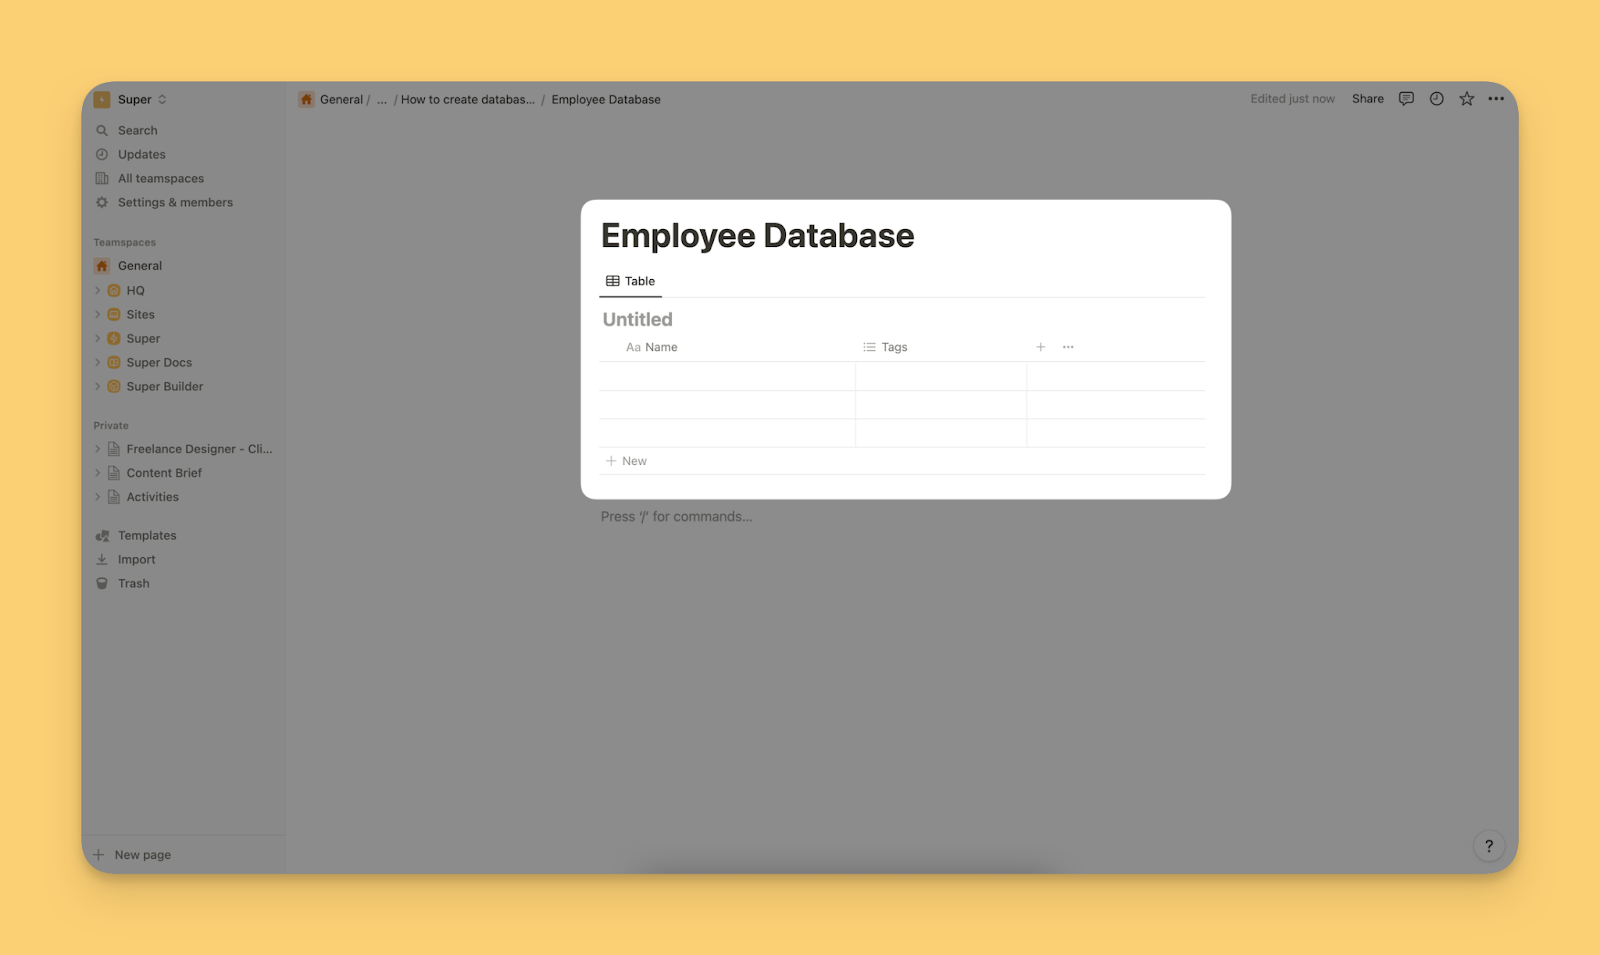
Let's use an employee database as an example.
2. Add columns, rows, and entries to the database
Notion provides Name and Tags as the default columns. You might want to change the names of columns and add more of them.
To add a column, simply click on the ➕ icon as shown in the image below.
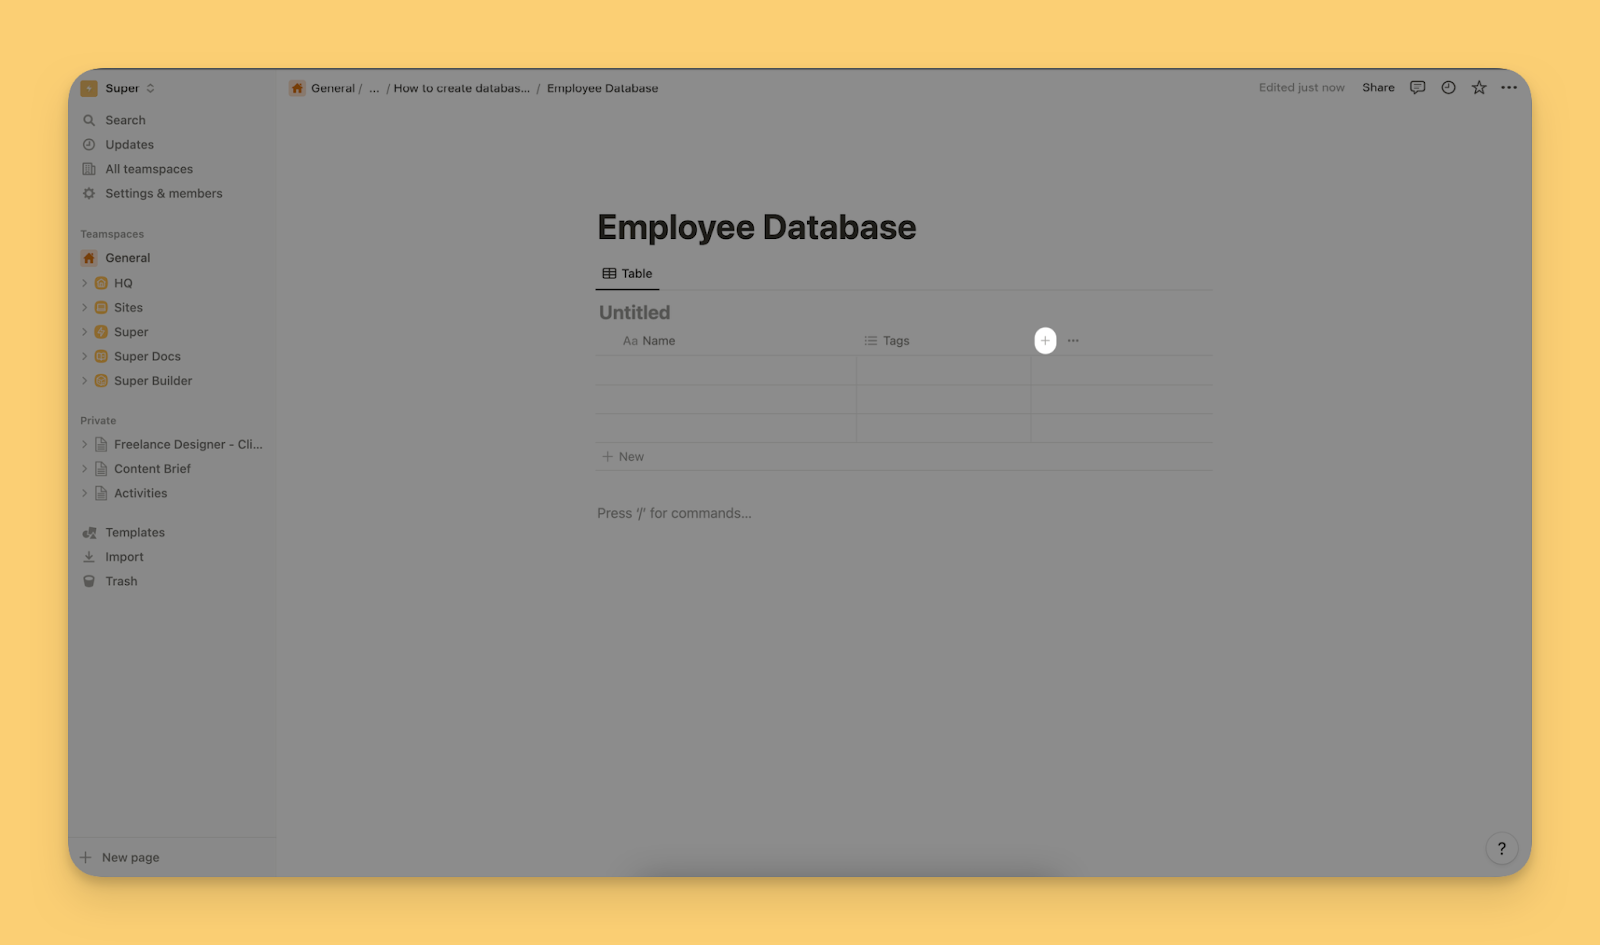
You can add a new row by clicking on the ➕New button.
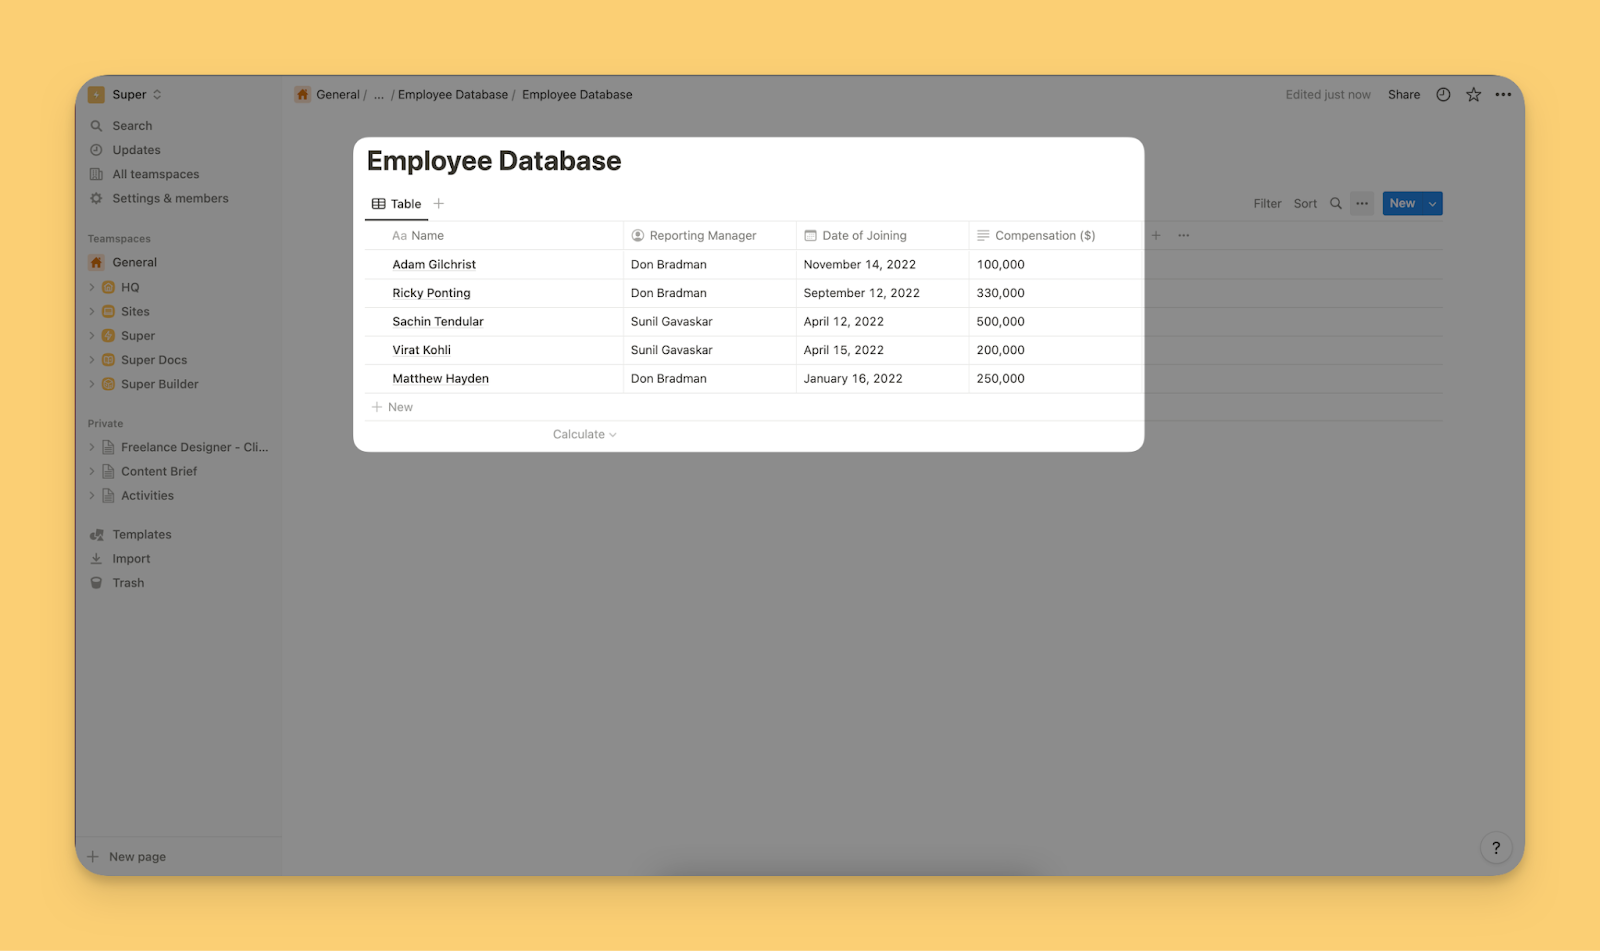
This is what the updated database looks like after adding columns.
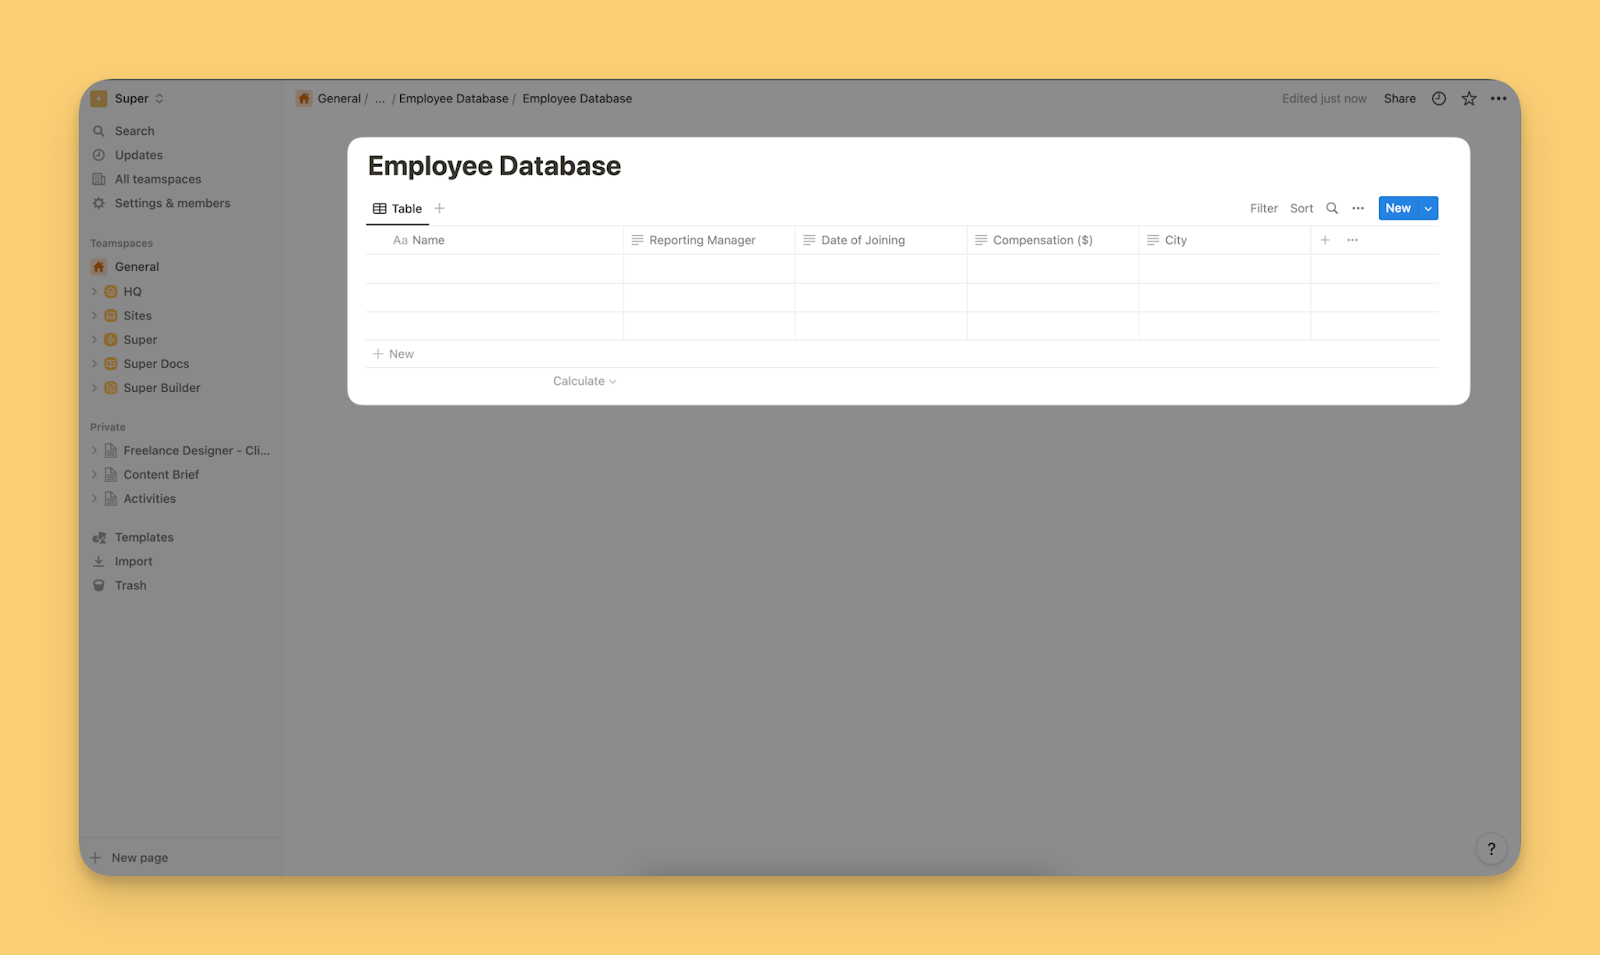
It is a very basic database with just the employee names, reporting details, date of joining the organization, and compensation. Actual employee databases are usually more detailed and complex. However, we will keep it simple for the purpose of guide.
3. Assign the entry type to columns
Notion allows you to specify the type of data that can be entered in each column. For example, the Date of Joining column must have entries in the date format. To set this up, click on the column name/header, click on type, and select Date from the list of data types that Notion supports.
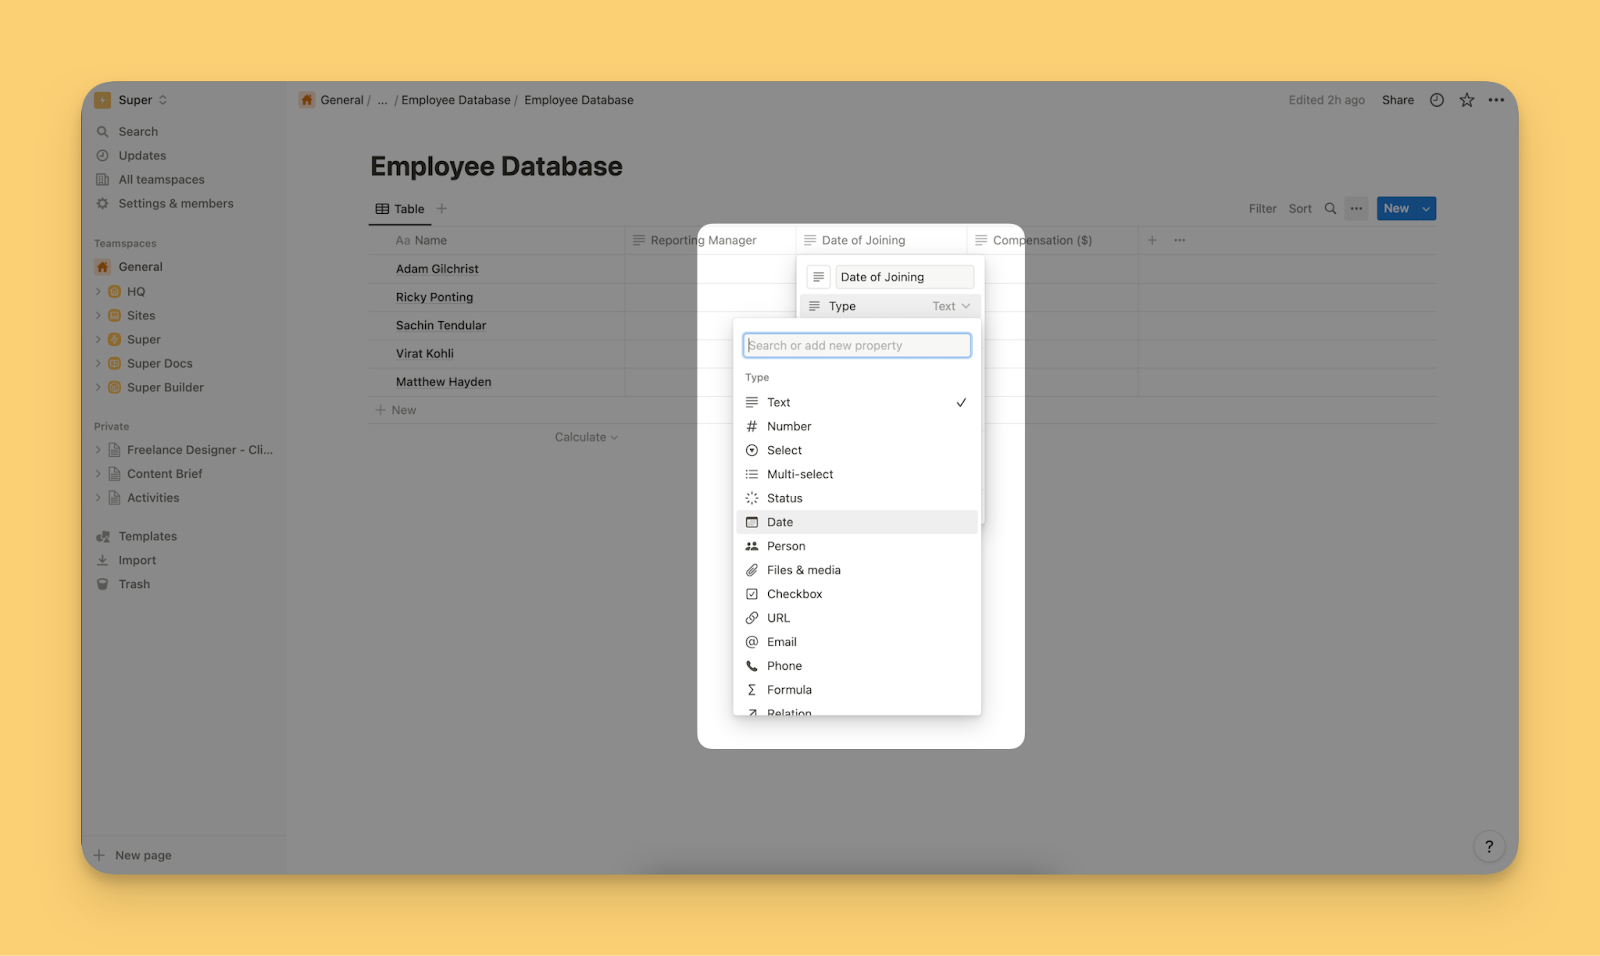
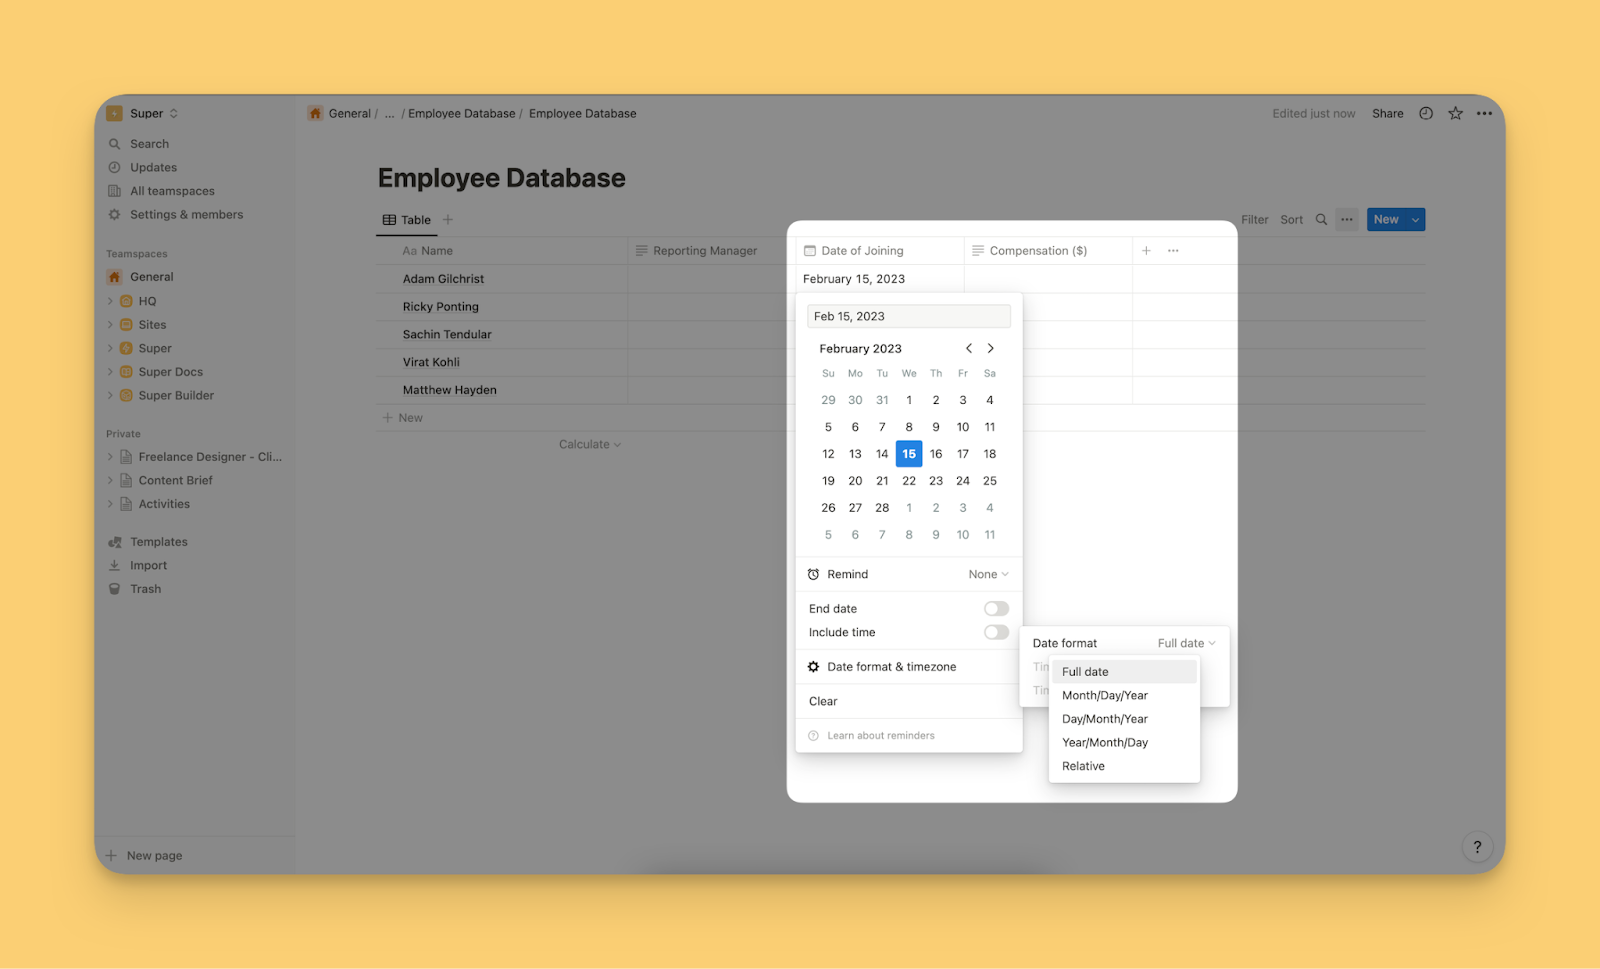
Now, every time someone clicks on any cell in the Date of Joining column, Notion will pull up a calendar for them to select a particular date.
Additionally, you can set up reminders for events by clicking on the drop-down menu next to Remind. You can also include the time or end date if the data point requires those details. Furthermore, you can select the date format and timezone by clicking on the Date format & timezone option.
You can require that the Reporting Manager be a current employee by selecting the Person data type.
Here’s what the table looks like after setting types for all four columns.
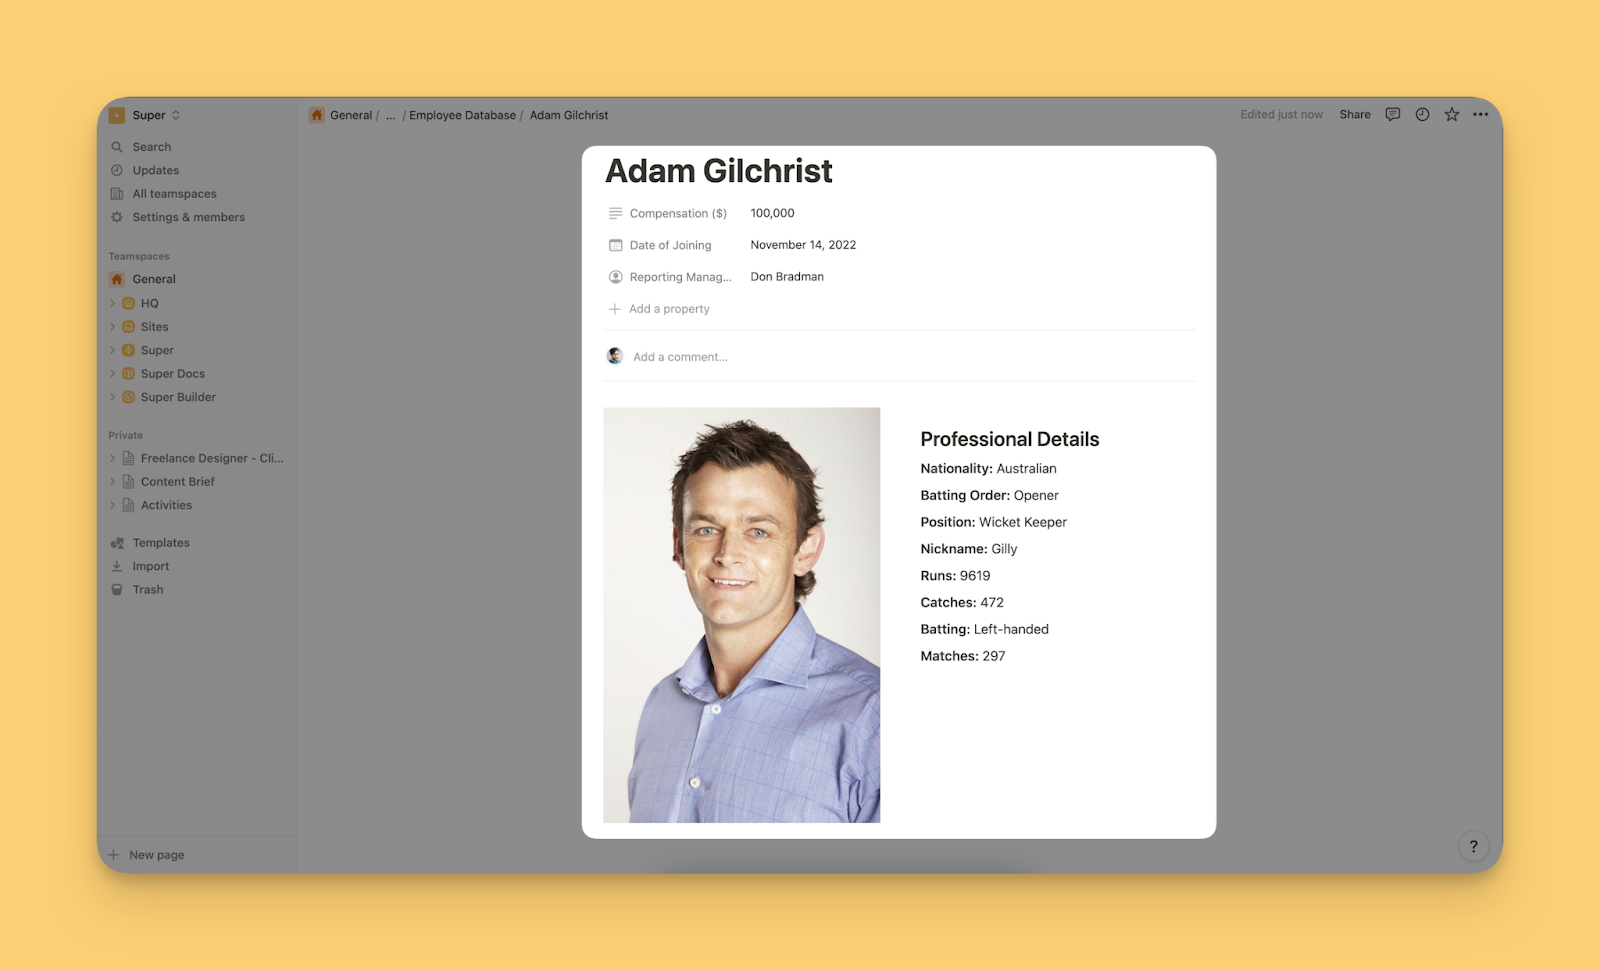
4. Add details for each entry
Every entry in the database is a Notion page. You can click on it to add more details.
For example, the image below shows the page for the employee - Adam Gilchrist with additional details.
5. Sort, filter, and search
Notion enables you to sort and filter data in your databases. You can access the list of columns by clicking on the Sort or Filter buttons, as shown in the image below.
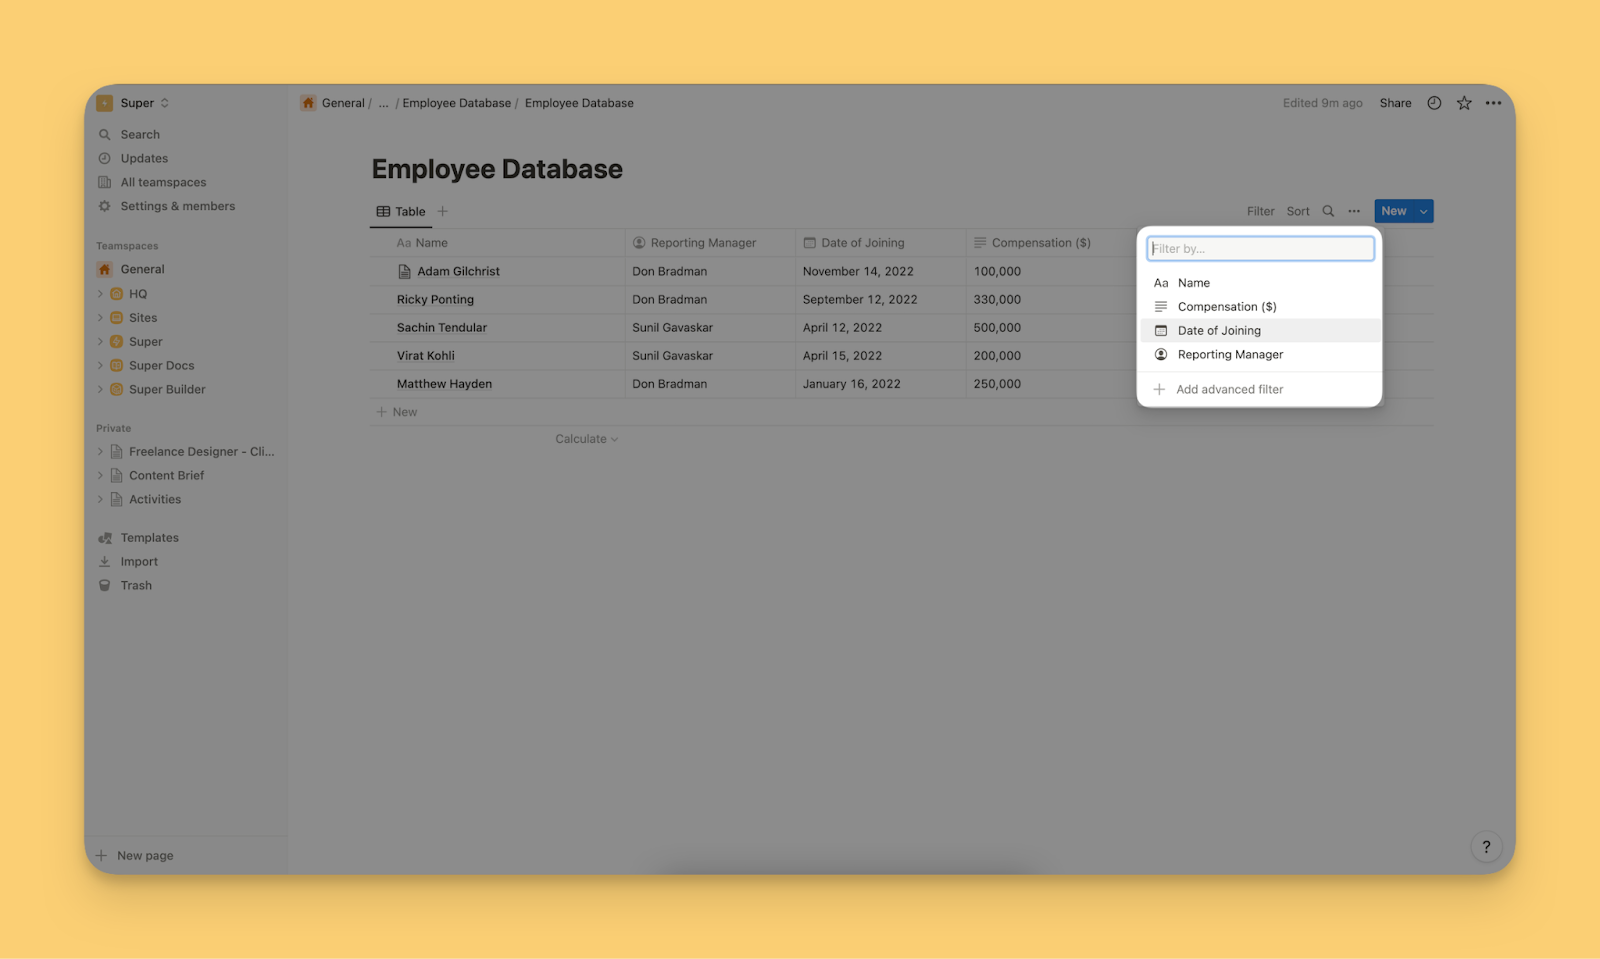
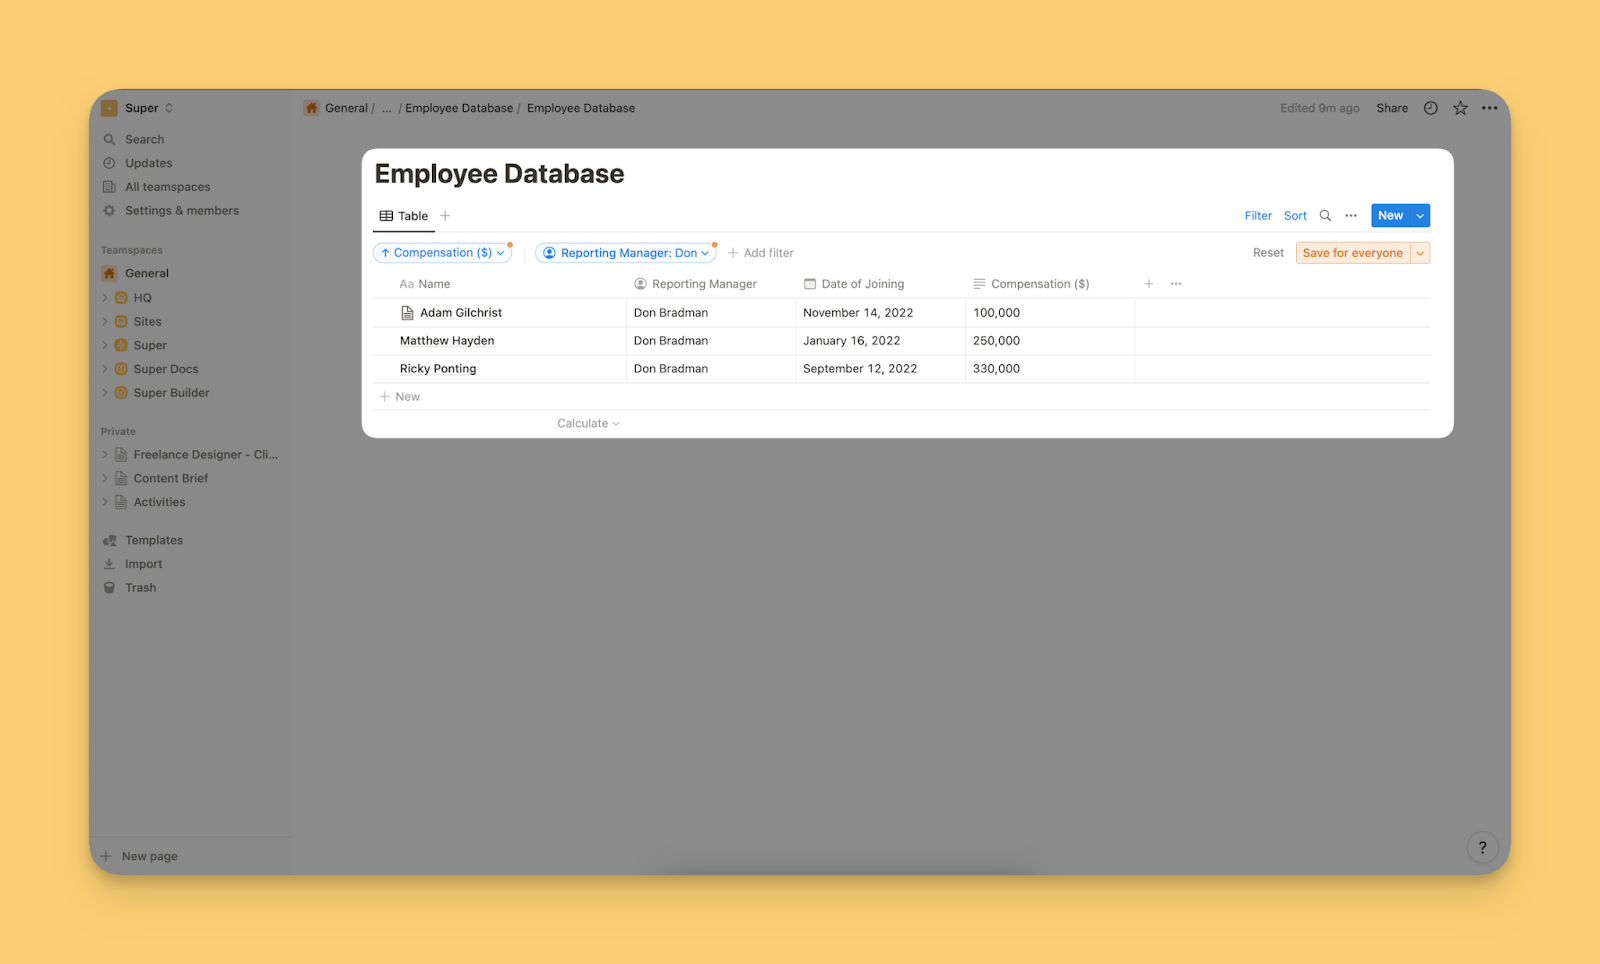
The image below shows an ascending sort of the Reporting Manager column with a filter applied.
Notion also has a search function that helps you find relevant data in large databases.
5. Use the Calculate feature
The Calculate feature available at the bottom of the database enables you to generate insights from the database contents. The options available on clicking the Calculate button depend on the Property Type assigned to the column.
For example, the Compensation ($) column is assigned the Number property type. You can carry out all these mathematical operations.
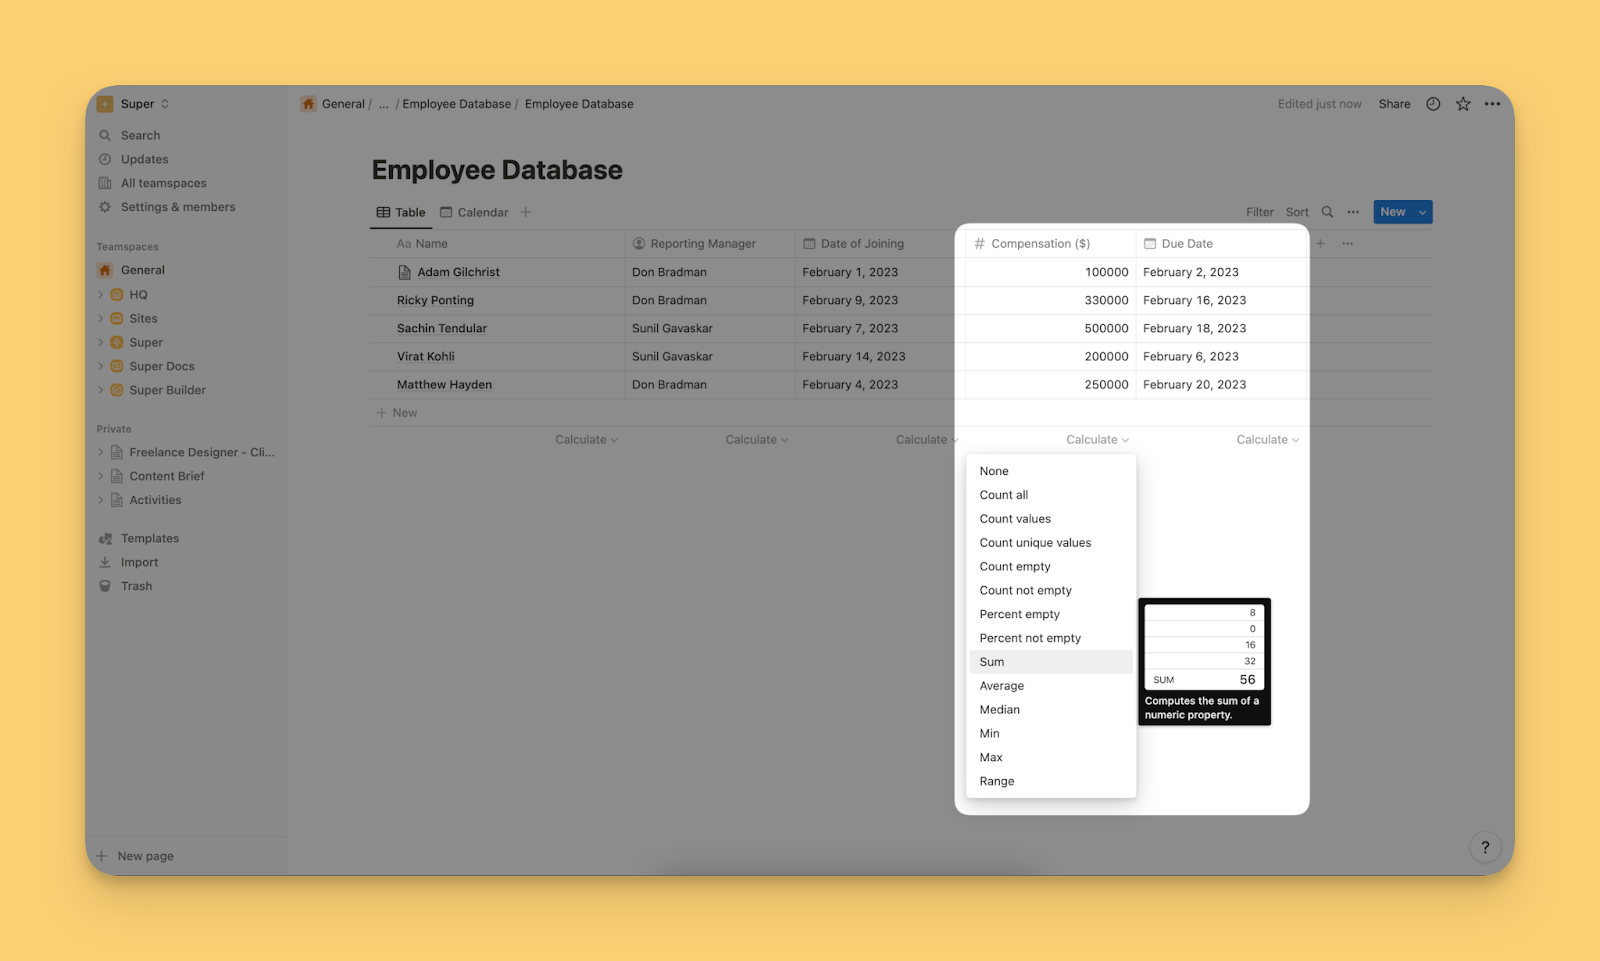
Similarly, the Date of Joining columns with the Date property type will have options like date range and earliest date.
6. Experiment with other types of database views
Notion allows you to create databases using a variety of views. So far, we have covered the Table view, but there are others available to you:
1. Calendar View
As the name suggests, this view displays data in a calendar format. You can set this view up for any column with the Date property type.
You can create this view by clicking on the ➕icon and selecting Calendar and choosing a column.In our example, this is what the calendar view looks like for the Date of Joining column.
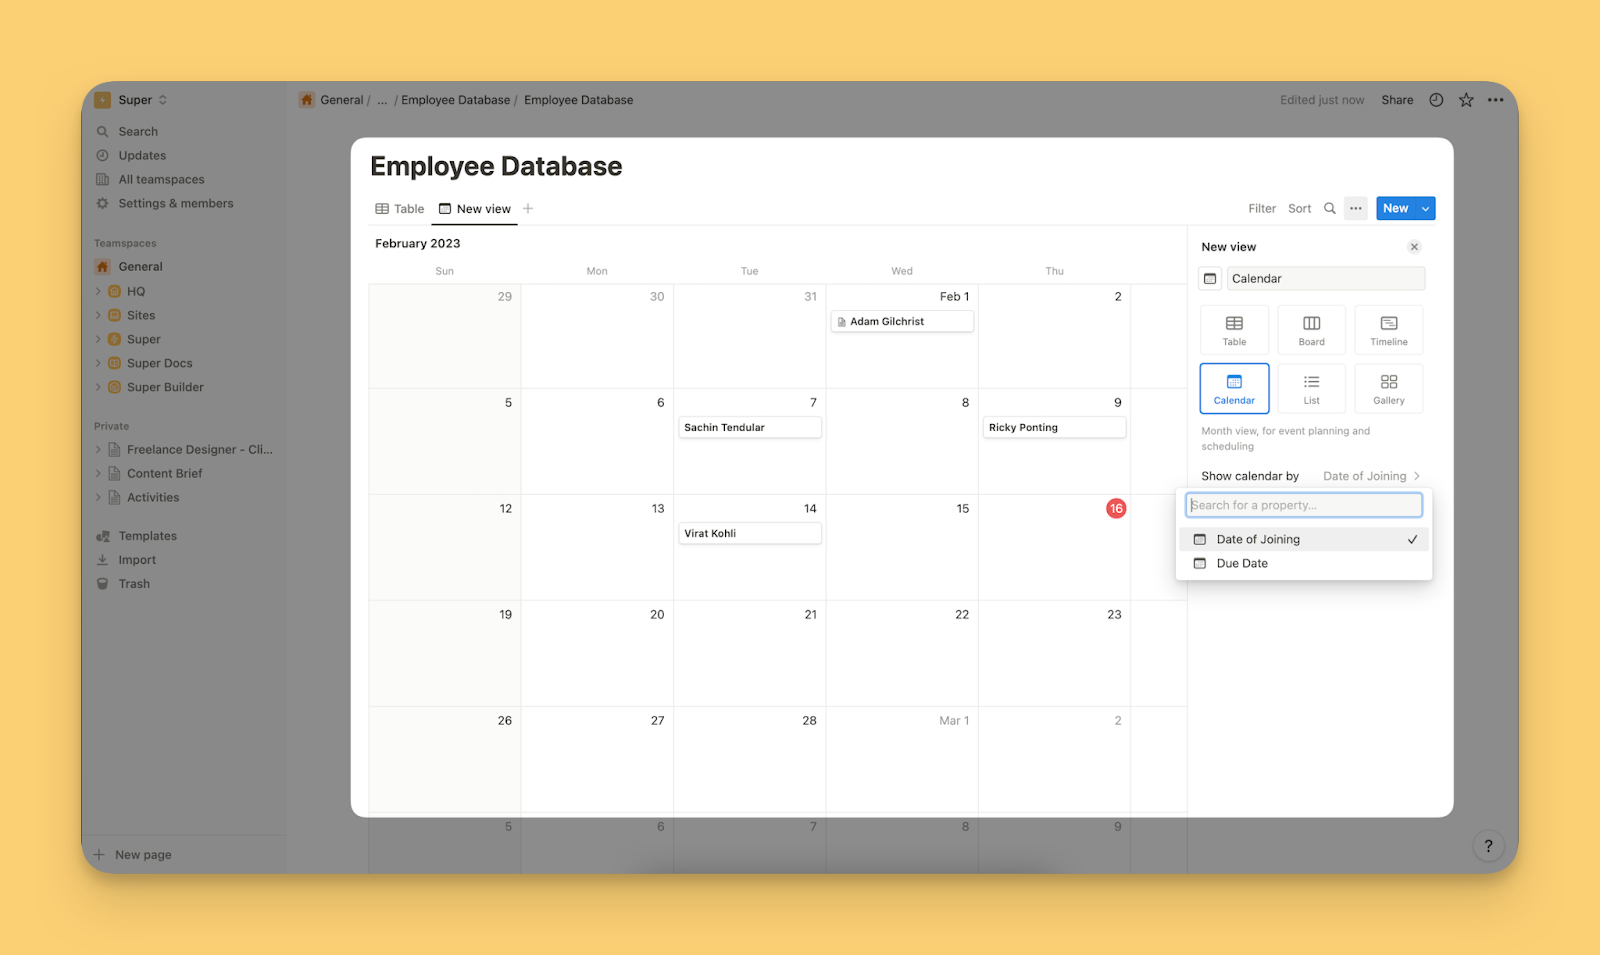
It shows the dates when the employees joined in a calendar format.
2. Board View
The Board view is typically used to manage a project. It gives you a Kanban-style visualization of your project. It sorts the tasks based on the Status property type assigned to a task.
You can easily move tasks from one status to another using Notion drag-and-drop feature.
3. List View
The list view displays the items in a list. It is useful if you want to take a quick glimpse of all the tasks in the pipeline, or in this case, the list of all the employees with all other details stripped off.
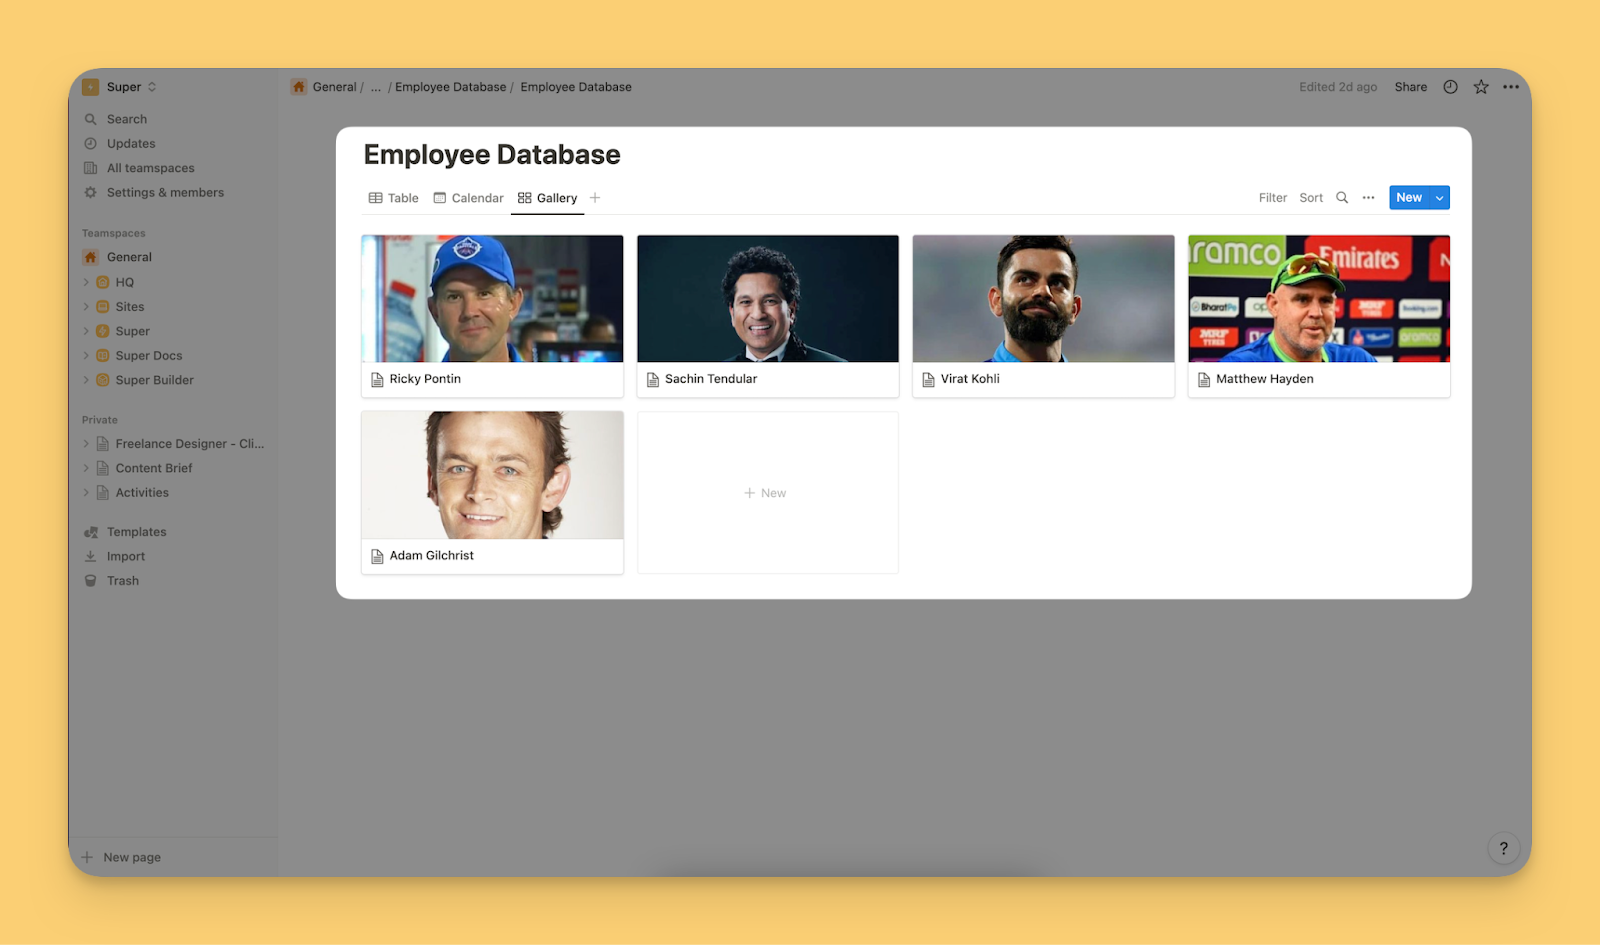
4. Gallery View
The gallery view gives a quick overview of every item in your database. If you are managing projects, the gallery view will display all the key details for tasks without having to open the task page.
In our example, the gallery view shows the photos of each employee.
How to use databases in Notion?
Here are some common use-cases of Notion databases:
1. Managing a Portfolio
Creating a portfolio in Notion is just one part of your freelancing journey. What’s also important is maintaining it. You must keep your portfolio updated with the new samples you produce for your clients. A database can help you streamline that function. It will help you record the samples you have already published and present them in a professional manner. You can also set reminders to enable weekly (or daily) notifications to update your portfolio.
2. CMS (Content Management System)
Notion is a headless content management system. You can use it as a CMS as it does a great job at storing and organizing your content through databases. But to truly create a functional Notion website, you need Super. Super can help you create aesthetic websites that are optimized for search engines, load fast, and integrate with your favorite tools.
3. CRM (Customer Relationship Management)
You can use Notion as a CRM by building customer databases to store contact information, interactions, history, and notes. You can track communication history, deals, and important dates to maintain relationships. Further, Notion enables you to customize your databases, making it extremely useful for streamlining workflows and keeping teams organized.
4. Content planning
You can seamlessly manage your editorial calendar on Notion and plan your content by using databases. You can set up databases in the different views like Kanban view, Gallery view, to visualize your content plan in different ways. You can also collaborate with team easily to create and design content.
5. Building a Knowledge Base
Create a centralized knowledge base with a database to store and categorize information. You can use tags, categories, or properties to organize articles, tutorials, FAQs, and other resources for easy retrieval.
6. Streamlining Business Activities
The robust, flexible features, of Notion databases such as customizable templates and real-time collaboration capabilities, allow teams to streamline project management and communication processes, relevant to business operations. With Notion, businesses can organize and share information effortlessly, promoting transparency and enabling better decision-making.
7. Managing Startups
Notion's databases can serve as the hub for all startup activities and data. Databases can help startup owners and leaders to:
- Effectively store and systemize their critical information within organized databases
- Visualize their initiatives using project boards for managing and monitoring progress
- Manage timeframes efficiently with calendars that track essential deadlines and events
- Promote interactive teamwork via commenting and task management features
8. Marketing
Notion databases can help marketing teams create unique buyer journeys and relevant content each path. You can get your team into a database and share resources and information with hem. For example, Notion databases can act as the repository of all campaign images created by the design team, which can be used by the SEO, Social Media, and Brand marketing teams for their campaigns.
9. Managing Projects
Notion is well know for it’s project management capabilities. You can create Notion databases to track tasks, assignees, deadlines, and project status. You can use properties like task name, assignee, due date, status, and priority to manage projects effectively.
10. Improving Productivity
If you are a freelancer, Notion databases can help you boost productivity. They serves as a unified workspace for managing different aspects of your projects - from tracking deadlines and escalations to organizing resources and information. The calendar view of Notion databases can help with effective time management, allowing you to visualize your schedule and keep up with freelance project milestones.
FAQs
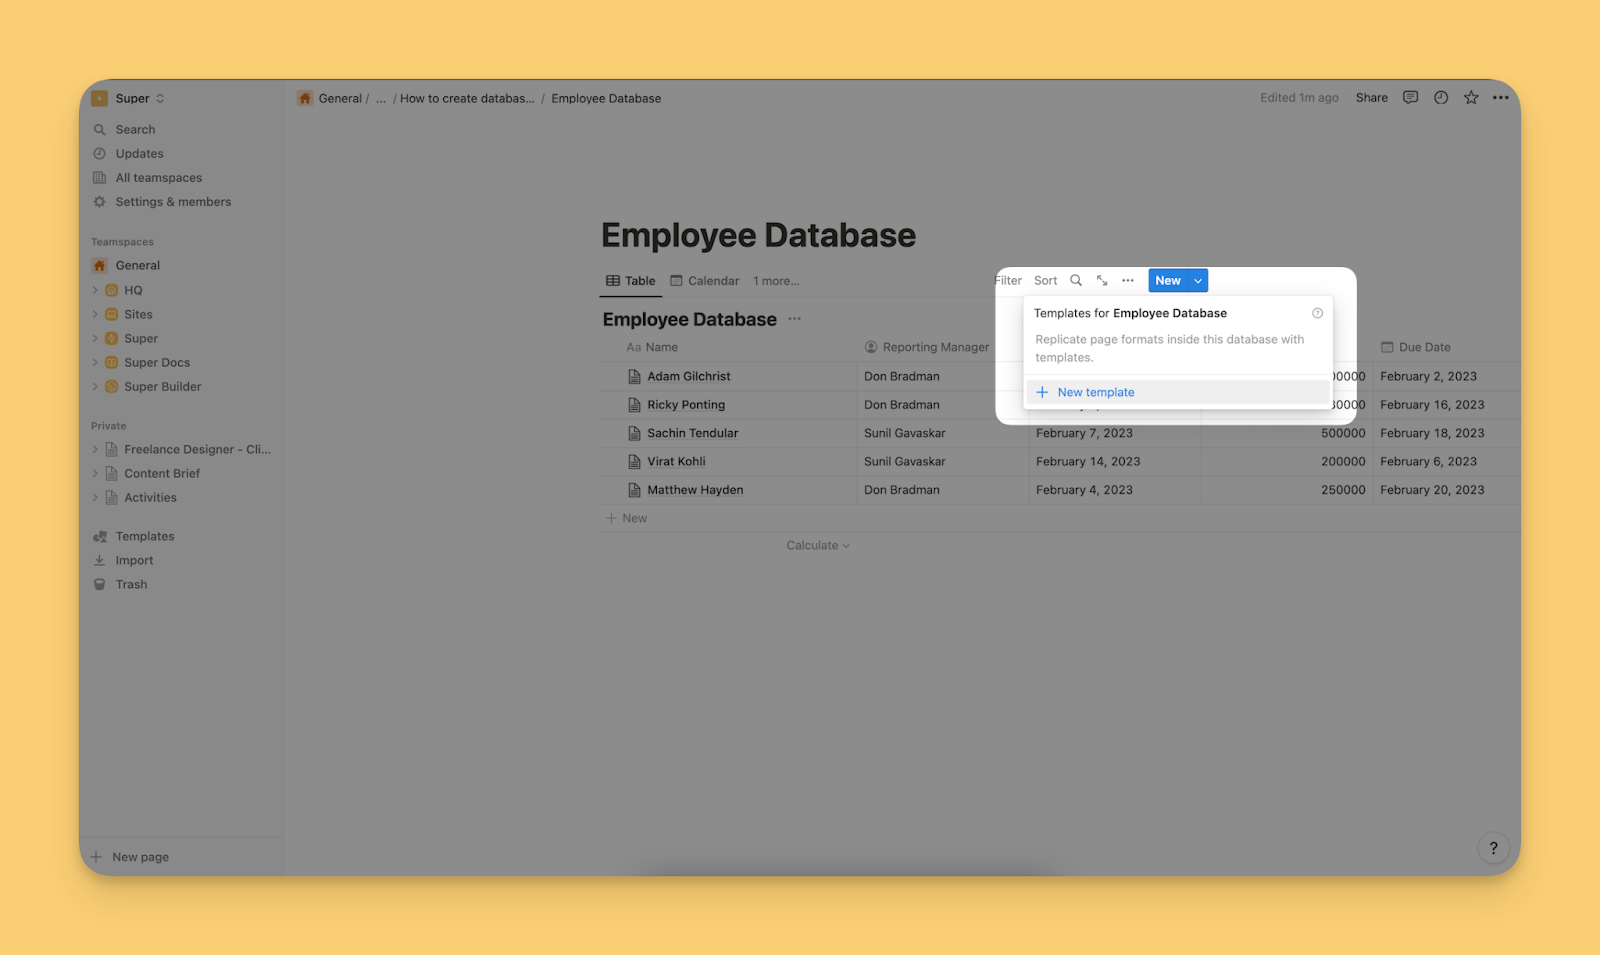
How do I create a database template in Notion?
Head over to the page where the Notion database is located, click on the dropdown next to the New button, and click on the +New Template button. Doing that will open a new page for the template where you can add new properties and the content you want to keep on the page.
How do I turn a page into a database in Notion?
You can turn pages into a database by simply dragging and dropping them into a database. In our example, when new employees join the organization, HR can create pages with the information about them and drag-drop those pages into the Employee Database.
