Table of contents
- What is Notion Gallery View?
- How to set up the gallery view in Notion?
- 1. Create a new page
- 2. Update the Notion gallery card
- 3. Make properties show in the gallery view
- 4. Make some finer changes
- 5. Get pictures to show in gallery view Notion
- 6. Resize the Notion gallery card
- 7. Share your Notion gallery view
- How to add an image to the gallery view in Notion?
- 1. Open the gallery view card to add an image
- 2. Create an ‘Image’ block
- 3. Add an image to the card
- 4. Make the image show in the Notion gallery view
- 5. Click the ‘Card preview’ dropdown and select the relevant option
- 6. Your images are now visible in the gallery view
- How to display property names in Notion gallery view?
- 1. Click the three-dots icon in your gallery view and then on ‘Properties’
- 2. Click the grayed out eye icons next to the properties that you want to display
- 3. The card properties are now visible in the gallery view
- Why is your Notion gallery view not showing image?
- 1. Incorrect card preview settings
- 2. Broken or invalid image links
- 3. Unsupported image format
- 4. Large image files
- Troubleshooting checklist
- Frequently asked questions
- What is the size of the Notion gallery view cover image?
- How to wrap text in Notion gallery view?
- How to make a photo gallery in Notion?
- How to customize the gallery view in Notion?
- How to link Notion gallery view to a page?
- How do I make gallery cards clickable like a website?
- How to make a gallery view with existing pages in Notion?
- How do I add Gallery view to an existing database
- How to change gallery image in Notion?
A Gallery View in Notion shows database items as cards with an image and selected properties. You can change card preview, size, and visible fields in View settings.
One of the key advantages of using Notion is its versatility, which allows you to create and manage data seamlessly. For example, the Notion database block alone lets you visualize data through six views: Table, Board, Timeline, Calendar, List, and Gallery.
With such a wide range of options, you can visualize any piece of information in multiple ways, making it easy to recognize and highlight the items that truly matter.
Check out our guide to creating Notion databases to learn how to use the different options. This article focuses only on the gallery view, including its use-cases, features, tips for adjusting your gallery cards, and more.
TL;DR
- Gallery View shows each database item as a card with an image and key properties.
- To make images appear on cards, set Layout → Card preview to Page cover or Page content, then add an image.
- Resize cards in Layout → Card size and choose which properties show on the card.
- Use Properties → Card to toggle labels like Status, Tags, or Price.
- Sort by priority or date. Filter to show Featured items or specific tags.
- Quick fix if images don’t show: confirm Card preview isn’t set to None, and that the page has a cover or an inline image.
Your gallery looks great in Notion. Make it public-ready with Super so every card links out, loads fast, and looks sharp on mobile.
Get started with Super for FREE
What is Notion Gallery View?
Gallery view is the most visually appealing form of all databases in Notion. It allows you to highlight images more than any other block, while also providing the option to bring other relevant elements of your project to the forefront.
For example, here’s what a sample employee database looks like in the gallery view.

It highlights only the employees’ photos and their names. But when you click on one of these cards, you will notice there is much more information available about each employee. Here’s what an employee card looks like with all its properties:

How to set up the gallery view in Notion?
Follow these steps to set up the Notion gallery view:
1. Create a new page
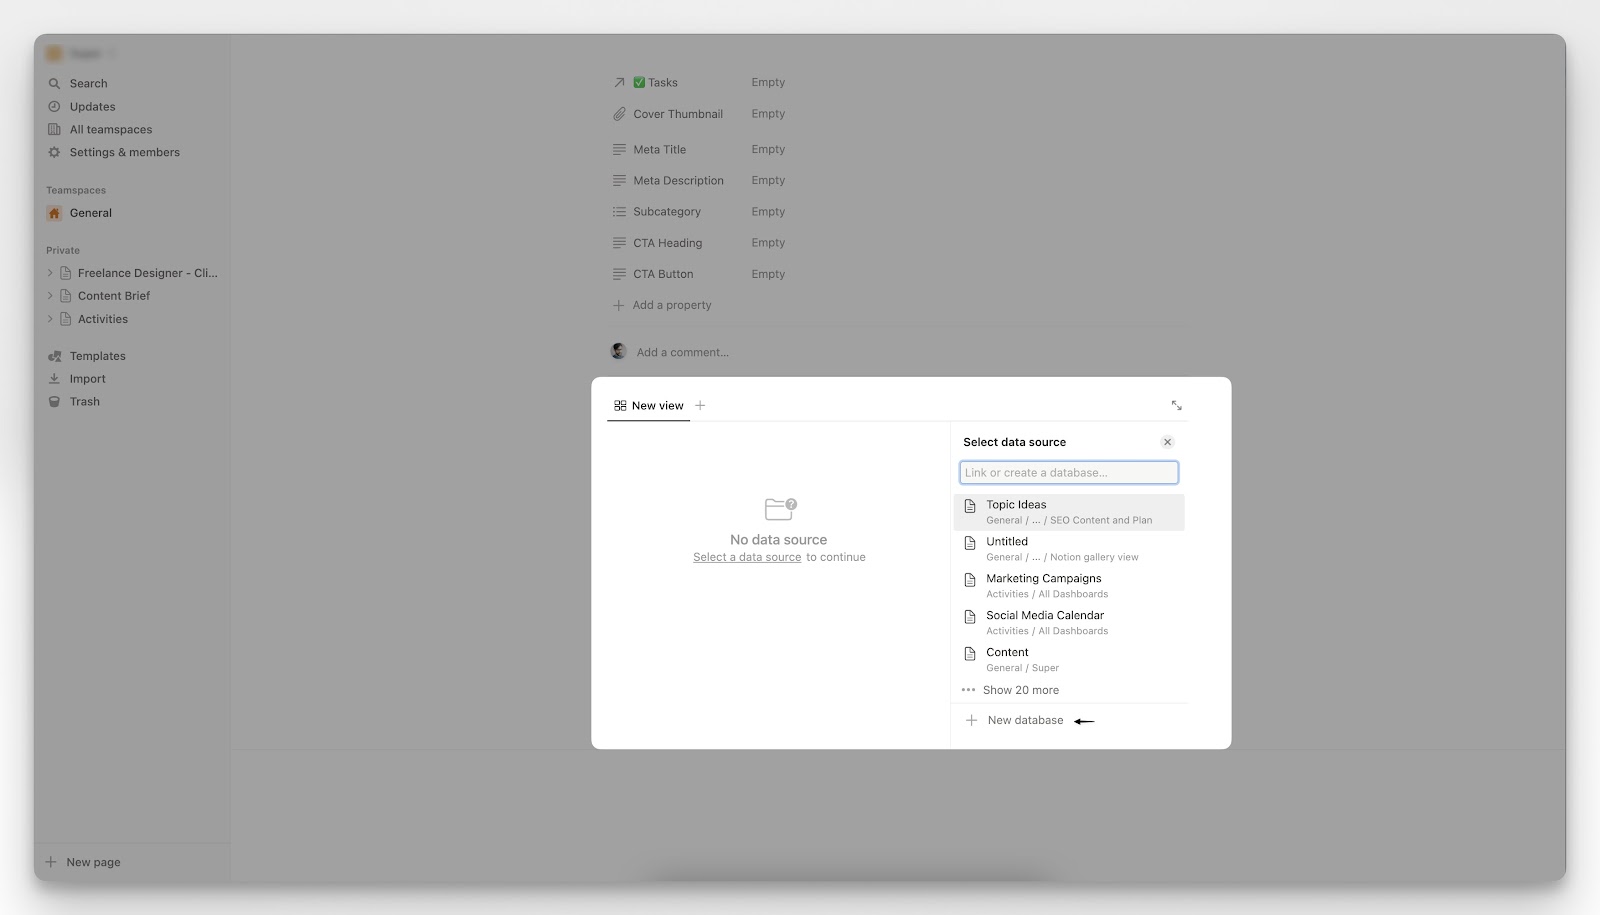
Create a new page or go to an existing page where you want to add the gallery view. Next, type ‘/’ to see the list of all the blocks that Notion offers. Finally, scroll down and select the Gallery View option.
Notion will now prompt you to select a datasource from an existing database. Alternatively, you can create a new one by clicking on the New Database button highlighted in the image below.
2. Update the Notion gallery card
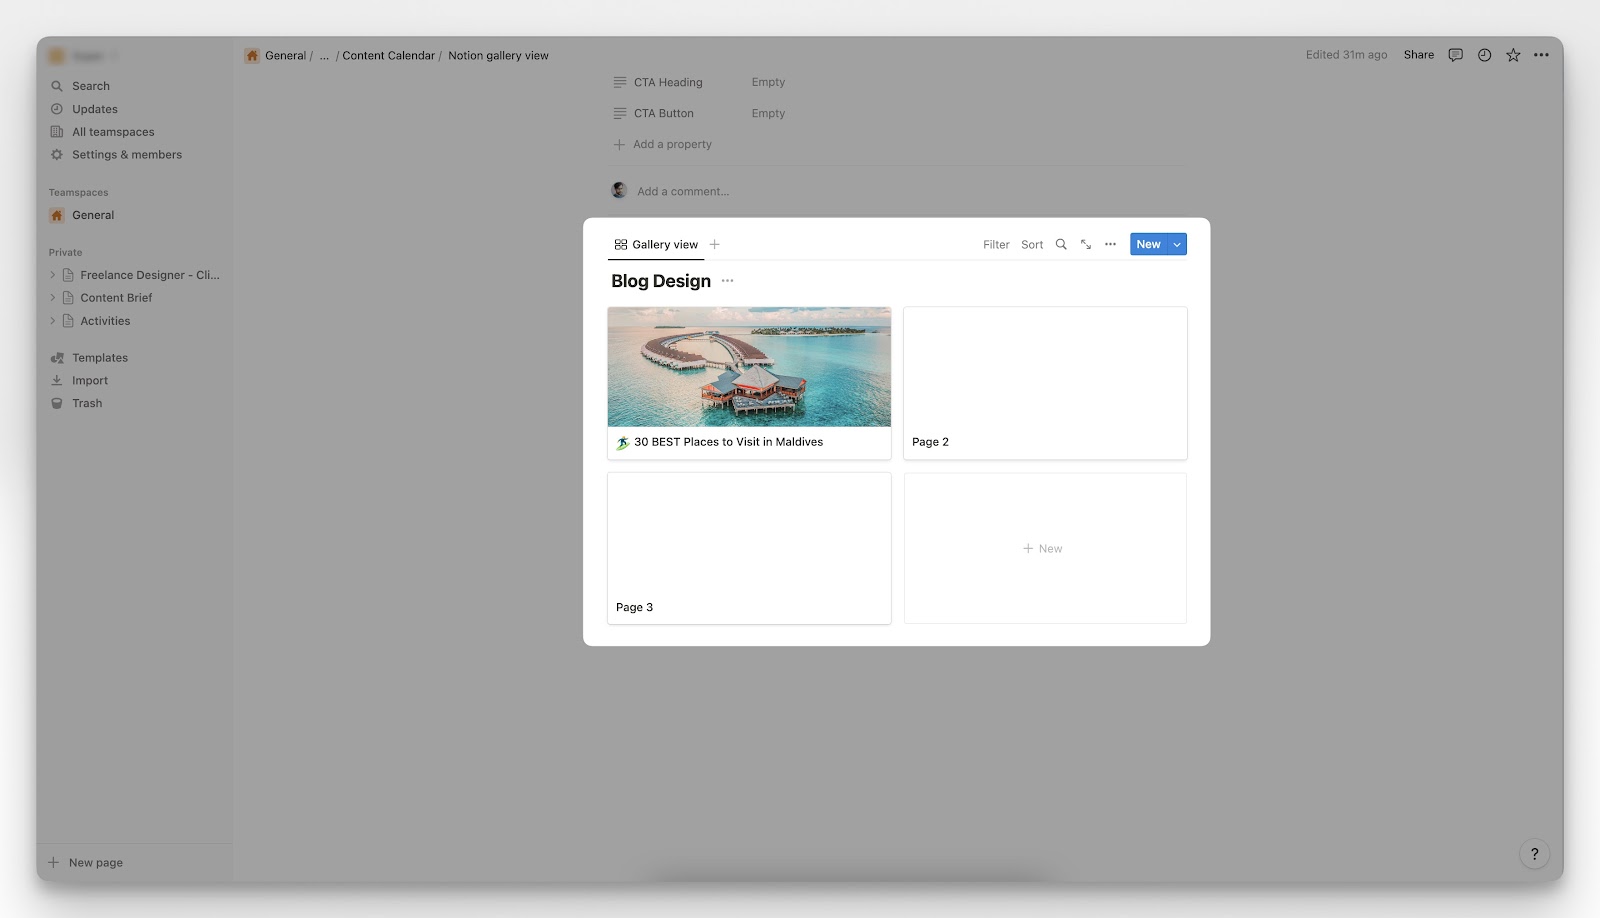
When you start with a new database, Notion displays an empty gallery view as shown in the image below.

Let’s update the gallery cards next. To do that, open a card in a pop-up view by clicking on it. Add a gallery cover image, an icon, and relevant properties. As an example for reference, we will create a gallery view for a tourism based blog.
Each card shall be a blog post with information on who writes the article, who reviews it, relevant dates, and blog content. We will also add some images that, as you will see later, Notion sets as gallery card images.
Here is what a sample card looks like.
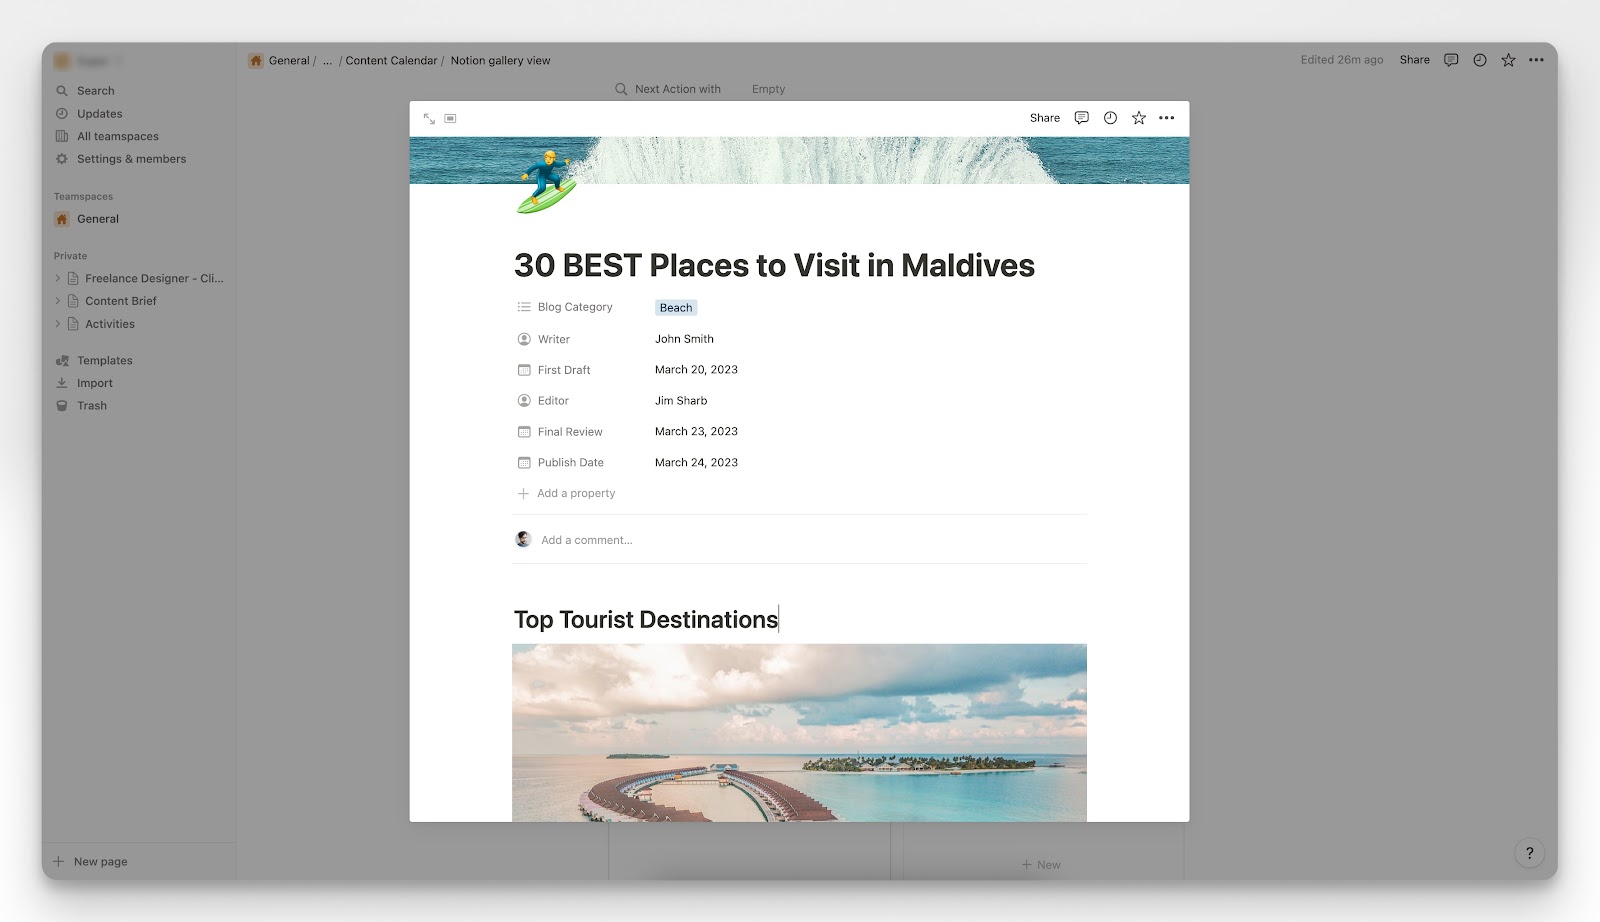
You can see the cover image at the top and the content image towards the bottom of the page. And here’s what the card looks like in the gallery view.
3. Make properties show in the gallery view
To view writer and reviewer information without opening a card, click the '...' icon next to the New button and select Properties.
Click on the eye icon to make these properties visible in the gallery view.
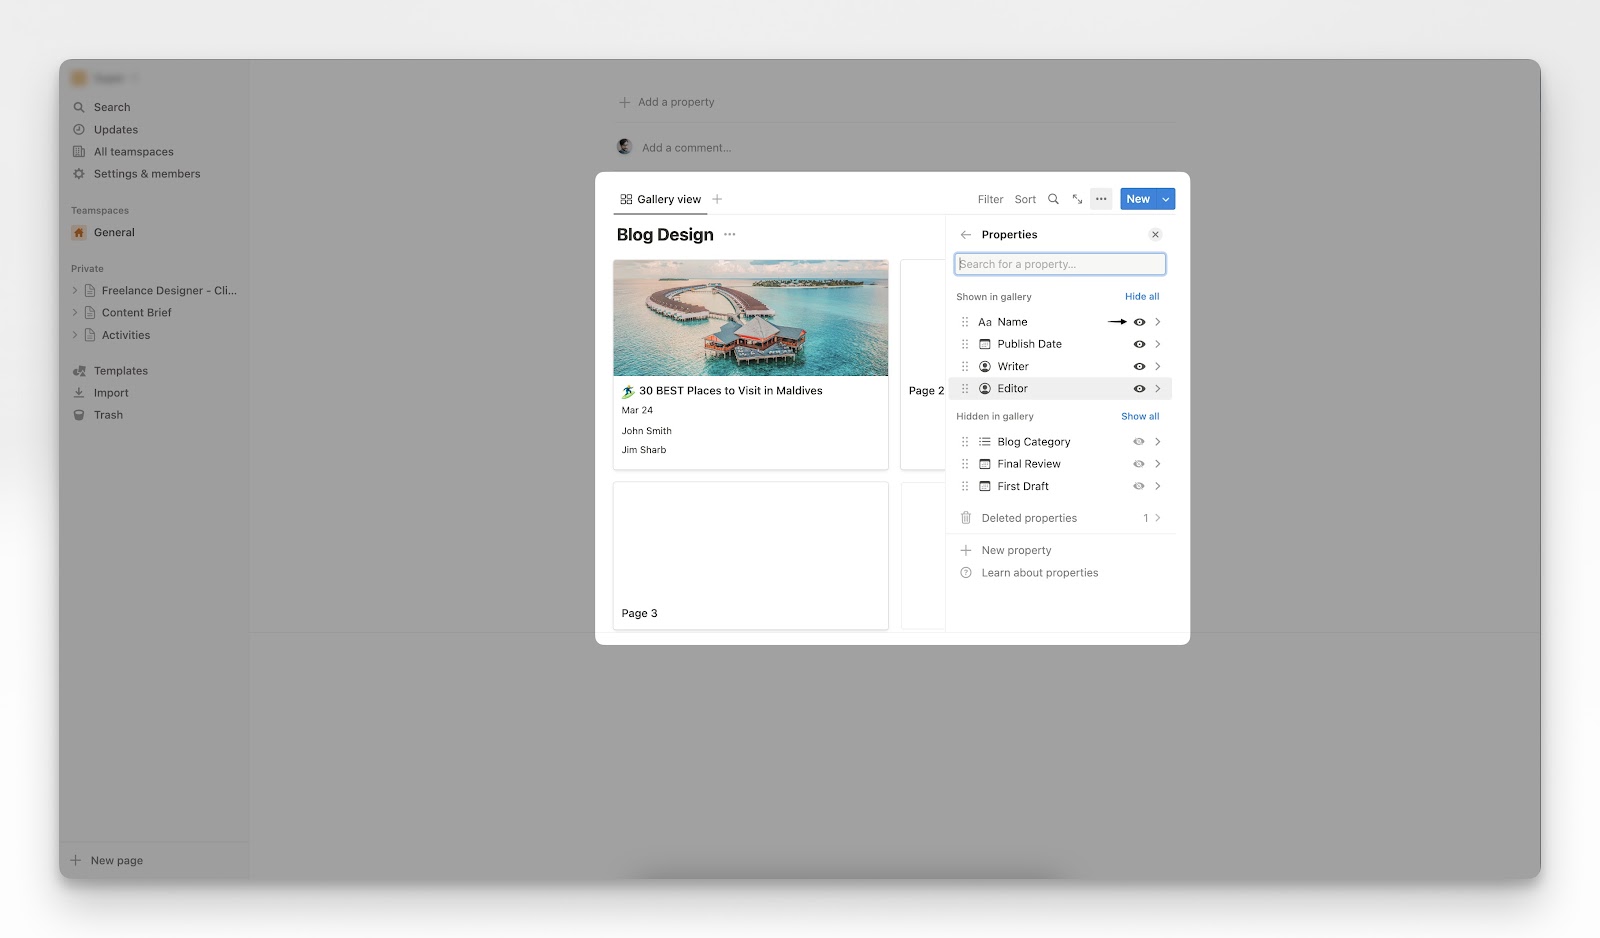
In the below image, you can see that the publish date, writer, and reviewer properties are now visible in the gallery card.
4. Make some finer changes
You will see the option to reposition the Notion gallery cover image when you hover over it. Click on the Reposition option. You will see the cursor icon change, indicating that you can click on it and drag around to reposition the image within the allocated area.
You can also filter and sort the cards based on any of the listed properties.
5. Get pictures to show in gallery view Notion
Notion allows you to choose which image (if any) to show on the cards. For example, if you want to show the cover image in the gallery view, instead of the image in the content, click on the ‘...’ icon next to the New button and then click on Layout.

Next, click on the Card Preview option and then on Page Cover to replace the content image with the cover image. If you select None, Notion will remove all images and show only the properties that you enabled in step #3.
Card preview options compared:
Card preview | Where the image comes from | Best for | Watch outs |
Page cover | The page’s Cover image | Portfolios, directories, product cards | Cropping varies. Reposition covers per page for better framing. |
Page content | First Image block in the page body | Recipe images, screenshots, catalogs | If the first image is too low on the page, nothing shows until it’s moved up. |
None | No image | Simple lists, spec databases | Looks plain and reduces visual scan speed. |
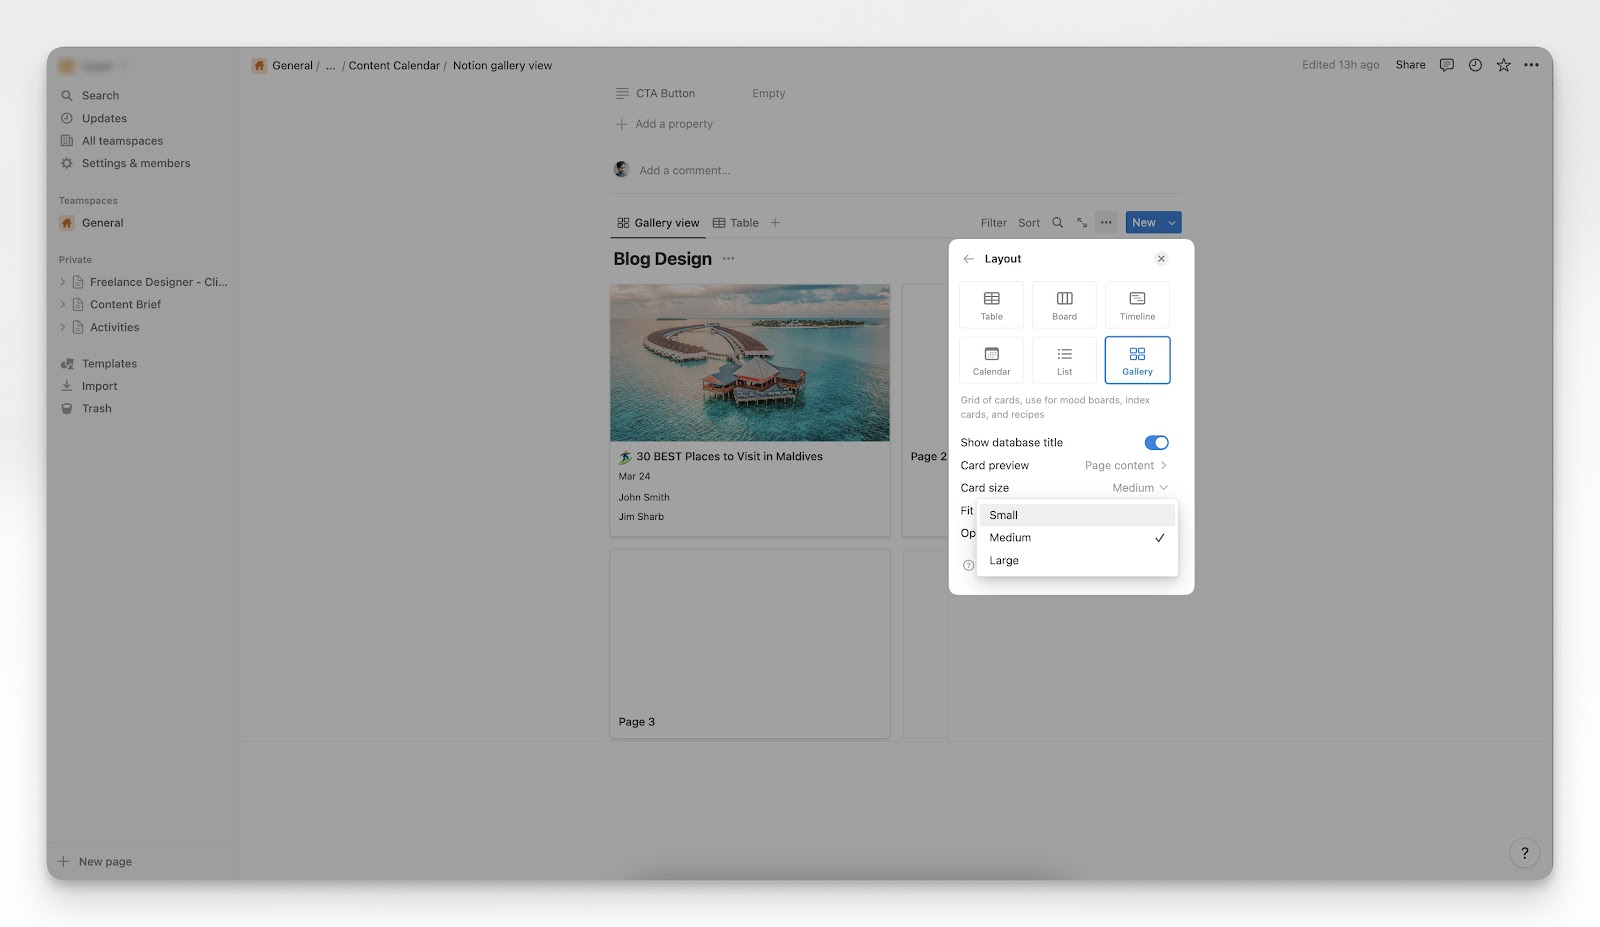
6. Resize the Notion gallery card
You can change the Notion gallery card size by clicking on the ‘...’ icon next to the New button and then on the Layout option. Finally, click on the Card Size option and choose one of the items in the drop-down. This way you can make the gallery view smaller or larger based on your preference.
7. Share your Notion gallery view
The content writers, reviewers, designers, and managers, should all have visibility into the status of each content piece. Now that the gallery view is ready, it’s time to share it with your team.
With Notion, you can easily share any page with a specific audience, by clicking on the Share button at the top-right corner of the screen. We cover the process in-depth in our guide to publishing Notion pages but what’s important to know here is that you can share your gallery view with anyone in the world with an internet connection.
That means you can publish pages and create websites in Notion. This feature is revolutionary if you are a freelancer or a small business because you can actually generate leads from Notion! But for that, you need to take care of a few aspects like SEO, website design, page load speed, etc.
If you are using Super, however, you do not need to worry about any of those. Super lets you purchase a domain without relying on an external tool. With that, you can have a custom domain without the notion.site. Extension.
How to add an image to the gallery view in Notion?
1. Open the gallery view card to add an image
The ‘employee database’ gallery view is missing an image for the card named Adam Gilchrist. This card displays properties instead, but to keep things uniform, let’s add an image to it.

2. Create an ‘Image’ block
Click on the card to open it in the central view and type ‘/image’ within the content. This will display the ‘Image’ block, clicking on it will insert an empty block into your page.
Adding a cover image also works but in this example, we will demonstrate how to set an image in content as the card thumbnail.

3. Add an image to the card
Notion allows you to insert images by uploading them from your device, inserting from Unsplash, or using an embed link from any website.

In our example, we will insert the image into the card using an embed link. Paste the link in the ‘Image’ block and click the ‘Embed image’ button to add the image to the gallery card.

4. Make the image show in the Notion gallery view
Click the three-dots icon and then on the ‘Layout’ dropdown.

5. Click the ‘Card preview’ dropdown and select the relevant option
We have selected the ‘Page content’ option but if you want to insert the cover image of the card, select the ‘Page cover’ option.

6. Your images are now visible in the gallery view
We now have the image appearing for Adam Gilchrist’s card as well.

How to display property names in Notion gallery view?
1. Click the three-dots icon in your gallery view and then on ‘Properties’

2. Click the grayed out eye icons next to the properties that you want to display
Let’s make the star rating appear under the cards in the Notion gallery by clicking the eye icon next to the ‘Star rating’ property.

3. The card properties are now visible in the gallery view

Why is your Notion gallery view not showing image?
Here are some reasons why your Notion gallery card image might not be showing:
1. Incorrect card preview settings
The “Card Preview” setting of your database determines what images show up in your gallery database. If this is set to ‘None’, your images won't appear. If it’s set to ‘Page cover’ and the card is missing the cover image or if the image is in the content of the page, it won’t appear in the gallery.
2. Broken or invalid image links
If you have embedded an image from the internet, make sure that the URL of the images is valid. If the URLs are broken or the images have been moved by the owner, the image preview will not be displayed.
3. Unsupported image format
Notion supports JPEG, PNG, and GIF files for images. Make sure that the images you chose are in that format.
4. Large image files
A free Notion plan allows you to add images that are up to 5MB in size. If your image is too large, it may not load. Reducing the file size may resolve the issue.
Troubleshooting checklist
- Card preview is set to Page cover or Page content, not None.
- A Cover actually exists or the first block in the page body is an Image.
- Image format is common and supported: JPG, PNG, GIF.
- Linked images aren’t broken or permissioned. Try re-adding if they fail to load.
- File size is reasonable to avoid slow loads. Compress overly large images.
- After changes, toggle to another view and back to refresh the preview.
Showcase products, projects, or recipes without code. Super turns your Notion Gallery View into a polished site with search and SEO.
Create your website with Super for FREE
Frequently asked questions
What is the size of the Notion gallery view cover image?
The size of the gallery cover image varies based on the device screen size. It is ideal to have a 1500px by 600px, but any image with an aspect ratio of 5:2 should work.
How to wrap text in Notion gallery view?
You can not wrap text in the gallery view. This feature is available only in the table and board views.
How to make a photo gallery in Notion?
You do not need to create a database to create a simple photo gallery in Notion. To create a Notion gallery:
- Type “/” in your Notion page, and select “Image” from the list of block.
- Drag-drop or embed an image into the block to display the image on the page. Repeat these two steps as many times as you need.
- Finally, move the images within the page by dragging and dropping them, like any other Notion block, to create rows and columns of images.
How to customize the gallery view in Notion?
We have already discussed how to move and resize your gallery card. The other customization options available to your are -
- Editing properties - You can edit the properties by following the same steps as creating a property in the “Update Notion Card” section.
- Change card preview - Go to the layout option as shown in the “Get pictures to show” section and choose if you want to show the image in the cover section or the content section.
How to link Notion gallery view to a page?
You can add URLs to the 'URL' property type and display them under gallery card images in Notion, but you cannot hyperlink the card images themselves unless you integrate Notion with the Super website builder. For example, Super's blog is essentially a gallery view database with clickable cards.
How do I make gallery cards clickable like a website?
In Notion, cards open database pages. If you want a public, clickable site, publish with Super and each card becomes a proper link.
How to make a gallery view with existing pages in Notion?
Create a gallery view with desired properties and move your pages into the database. Ensure that each page has an image at the right place to make it appear in the gallery view. For example, if you have set displaying the cover images as thumbnails, make sure that all pages you move have a cover image that Notion can source as a thumbnail for the pertinent card.
How do I add Gallery view to an existing database
Click the view name, choose + New view, pick Gallery, then save.
How to change gallery image in Notion?
If your gallery image is present within the content of the card, simply open the card and replace the image. The new image will appear in the gallery. Alternatively, if you want to display the cover image instead of the image in the content, click the three-dots icon from the gallery view, click on layout, and change the card preview to ‘Page cover’.
Get Super’s bi-weekly Notion Newsletter
